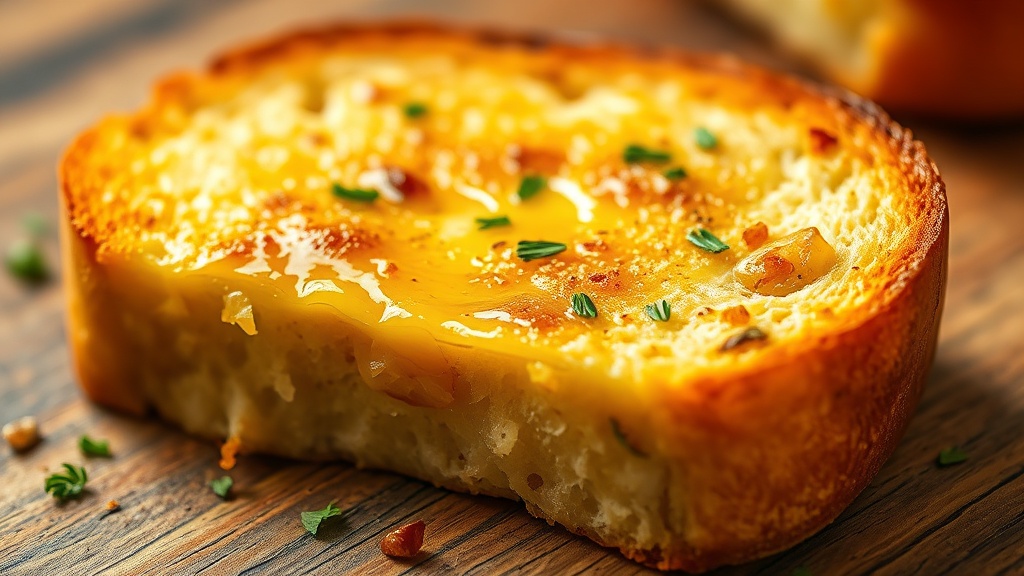
To make garlic bread in a toaster oven, spread a butter and garlic mixture onto sliced bread, then bake at 375°F for 8–10 minutes, finishing with a 1–2 minute broil for a golden, crispy top. The toaster oven’s compact size means heat circulates efficiently around the bread, giving you even browning without heating up your whole kitchen. It’s genuinely one of the best uses for a toaster oven — fast, simple, and the results are hard to beat.
Safety First: Toaster ovens reach temperatures up to 450°F and the interior walls, rack, and baking pan stay dangerously hot long after cooking ends. Always use oven mitts when removing bread or adjusting the rack. Never leave the toaster oven unattended while broiling — butter and oil can cause flare-ups within seconds. Keep the appliance at least 4 inches from walls, cabinets, and curtains during use.
Key Takeaways
- Bake garlic bread at 375°F for 8–10 minutes, then broil for 1–2 minutes to get a crispy, golden top.
- Softened (not melted) butter blends more evenly with garlic and herbs, giving better coverage and flavor.
- For cheesy garlic bread, add mozzarella or Parmesan in the last 3 minutes of baking — not from the start.
- A toaster oven baking pan lined with foil makes cleanup almost effortless.
- Frozen garlic bread works in a toaster oven too — no thawing needed, just add 3–4 extra minutes.
What You’ll Need Before You Start
You don’t need much. That’s honestly one of the best things about this recipe. A handful of ingredients, a decent toaster oven, and about 15 minutes of your time.
Ingredients
- 1 loaf of Italian or French bread (or a baguette), sliced in half lengthwise
- 4 tablespoons of unsalted butter, softened to room temperature
- 3–4 garlic cloves, minced (or 1 teaspoon of garlic powder in a pinch)
- 2 tablespoons of fresh parsley, finely chopped (optional but recommended)
- A pinch of salt and a small pinch of red pepper flakes if you like a little heat
- ½ cup shredded mozzarella or grated Parmesan, if making cheesy garlic bread
Equipment
- A toaster oven (any standard countertop model works — see our picks for the best mini toaster ovens if you’re shopping)
- A baking pan or tray that fits your toaster oven
- Aluminum foil for easy cleanup
- A butter knife or small offset spatula
- Oven mitts — non-negotiable
Fresh garlic versus garlic powder is a real debate. Fresh minced garlic gives you those slightly caramelized, roasty pockets of flavor. Garlic powder is more uniform and a bit more mellow. Both work. I usually go fresh when I have time and powder on a Tuesday night when I don’t.
How to Make the Garlic Butter
The butter has to be soft. Not melted — soft. If you try to spread cold butter, it’ll tear the bread. If it’s fully melted, it’ll soak in and make the bread dense and greasy instead of buttery and crisp. Room temperature is the sweet spot.
Mix the softened butter with your minced garlic (or garlic powder), parsley, and a small pinch of salt in a bowl. Stir it well until everything is evenly combined. You want it spreadable but still holding its shape. The Serious Eats approach to garlic bread actually recommends letting this mixture sit for a few minutes before spreading, so the garlic has time to infuse into the butter. It makes a noticeable difference.
Spread the garlic butter generously across the cut side of both bread halves. Don’t be shy here. Go all the way to the edges — the edges brown fastest and you want butter protecting them from drying out. An even layer about ¼ inch thick is ideal.
Baking Garlic Bread in a Toaster Oven: Step-by-Step
Step 1 — Preheat the Toaster Oven
Set your toaster oven to 375°F on the bake setting. Let it preheat fully — usually 3–5 minutes depending on your model. Don’t skip this. Putting bread into a cold toaster oven and letting it slowly heat up dries it out before it ever crisps. You want immediate, consistent heat the moment the bread goes in.
Step 2 — Prep the Pan
Line your baking pan with a sheet of aluminum foil. Place the bread halves cut-side up on the pan. Make sure they’re not overlapping or hanging over the edges. If your loaf is too long for the pan, cut the halves into thirds — it actually makes serving easier anyway.
Step 3 — Bake
Slide the pan into the toaster oven on the middle rack and bake at 375°F for 8–10 minutes. At the 8-minute mark, check it. The butter should be fully melted and slightly bubbling, and the edges of the bread should just be starting to turn golden. If it looks pale, give it the full 10 minutes.
Step 4 — Broil for the Crispy Top
Switch to the broil setting and give it 1–2 minutes. Watch it the entire time. Seriously — do not walk away. The difference between perfectly golden and burned is about 45 seconds under a broiler. You’re looking for a light golden brown with some slightly darker spots where the garlic has caramelized. That’s the good stuff.
Pull it out, let it cool for 2 minutes on the pan (the bottom stays hot), then slice and serve. Want to know more about how your toaster oven handles different heating modes? Check out our guide on reheating food in a toaster oven for a deeper look at bake vs. broil settings.
Cheesy Garlic Bread Variation
Add cheese and everything changes. In the best way possible.
Follow all the same steps above, but at the 6–7 minute mark, pull the pan out and scatter shredded mozzarella (or grated Parmesan, or both) over the top of each bread half. Return to the oven for another 2–3 minutes until the cheese is melted and starting to bubble. Then hit it with the broiler for 60–90 seconds to get that golden, slightly blistered top.
The trick with cheese is not adding it too early. If you put it on at the start, it melts fast and then sits there getting tough and rubbery before the bread is even done. Add it late and it stays gooey and fresh-tasting. According to Food Network’s tips on cheesy garlic bread, a mix of mozzarella for melt and Parmesan for flavor gives you the best of both worlds. Hard to argue with that.
Temperature and Timing Comparison
Different bread types and styles need slightly different treatment. Here’s a quick reference chart so you’re not guessing.
| Bread Type / Style | Temperature | Bake Time | Broil Time |
|---|---|---|---|
| French or Italian loaf (halved) | 375°F | 8–10 min | 1–2 min |
| Baguette slices (individual) | 375°F | 6–8 min | 1 min |
| Texas toast slices | 350°F | 5–7 min | 1 min |
| Cheesy garlic bread (loaf) | 375°F | 9–11 min | 1–2 min |
| Frozen garlic bread (store-bought) | 375°F | 12–14 min | 1–2 min |
| Sourdough slices | 375°F | 7–9 min | 1 min |
Toaster ovens vary in power and how evenly they heat — if yours runs hot, knock 1–2 minutes off the bake time and keep a close eye during broiling. For more on how temperatures work across different appliances, our article on how hot a toaster gets is worth a read.
Tips for Getting It Right Every Time
- Use day-old bread. Slightly stale bread has less moisture and crisps up better than fresh bread straight from the bag.
- Don’t cover with foil. Some people tent their garlic bread to keep it moist, but in a toaster oven that traps steam and prevents crisping. Leave it uncovered.
- Rotate halfway through. If your toaster oven has hot spots (most do), rotate the pan 180° at the halfway mark for even browning.
- Use the right rack position. Middle rack for baking; move up one notch closer to the broiler element when you switch to broil mode.
- A toaster oven wire rack can elevate the bread slightly off the pan surface for better airflow and more even crisping on the bottom.
Wrapping It Up
Garlic bread in a toaster oven isn’t just a workaround when you don’t want to fire up a full-size oven — it’s genuinely the better method for small batches. The compact space, focused heat, and built-in broil function give you crispy edges, a soft interior, and that golden, buttery top that makes garlic bread worth making in the first place. Bake at 375°F for 8–10 minutes, broil for 1–2 minutes, and you’re done. It works every single time.
And once you’ve nailed this, try it with different breads, different cheeses, or even a drizzle of olive oil mixed into the butter. The base method stays the same. The variations are endless.
Frequently Asked Questions
What temperature do you cook garlic bread in a toaster oven?
375°F is the ideal temperature for garlic bread in a toaster oven. It’s hot enough to crisp the bread and melt the butter without burning the garlic before the center warms through. Finish with 1–2 minutes on broil for a golden top.
How long does garlic bread take in a toaster oven?
Garlic bread takes 8–10 minutes at 375°F in a toaster oven, plus 1–2 minutes under the broiler. Thinner slices like baguette rounds may only need 6–8 minutes, while frozen garlic bread needs closer to 12–14 minutes with no thawing required.
Can you make garlic bread in a toaster oven without it burning?
Yes — the key is staying at 375°F for the bake portion and watching closely during the 1–2 minute broil at the end. Burning almost always happens when the broiler is left unattended. Keep the bread on the middle rack during baking and only move it higher when switching to broil.
Can you make frozen garlic bread in a toaster oven?
Frozen garlic bread works perfectly in a toaster oven straight from the freezer — no thawing needed. Bake at 375°F for 12–14 minutes, then broil for 1–2 minutes to get a crispy top. Store-bought frozen garlic bread often has butter already applied, so no extra prep is needed.
Is a toaster oven or regular oven better for garlic bread?
A toaster oven is actually better for small batches of garlic bread because it preheats faster, heats the bread more efficiently in the compact space, and gets you to the broil step quicker. A full-size oven makes more sense when you’re cooking garlic bread for a crowd — say, two or more full loaves at once.
—
Written by
Emma is a home cook who loves coaxing big flavor out of a toaster oven — from crispy roasted vegetables to easy weeknight dinners and sweet treats. She develops and tests Toastera's recipes for small-appliance kitchens.
Free: the Toaster Oven Cheat Sheet
Get the printable cheat sheet (temps, cook times & safety tips) plus new recipes. No spam, unsubscribe anytime.