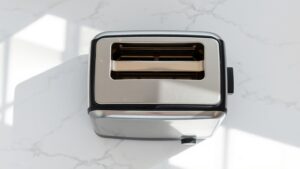
Look, I get it. Your toaster oven heating elements are crusty, grimy, and probably have bits of last Tuesday’s pizza cheese welded onto them. And the last thing you want to do is start yanking out those delicate heating coils because, honestly, that sounds like a great way to break something expensive. The good news? You don’t have to remove them to get them clean. I’ve been there, staring at those gunked-up elements, and I’ve learned a few tricks that actually work.
Safety First: Always unplug your toaster or toaster oven and allow it to cool for at least 1 hour before cleaning or inspecting components. Never use water near electrical parts. If you notice damaged wiring, stop using the appliance and consult a qualified technician.
How often should I clean my toaster oven heating elements?
It depends on how often you use your toaster oven and what you’re cooking in it. For most people, a light brushing every month and a deeper clean every 2-3 months works well. But if you’re using it daily or cooking greasy foods frequently, you might need to clean it more often. Watch for visible buildup or any smoking when the oven heats up—those are signs it’s time to clean.
Can I use commercial oven cleaner on toaster oven heating elements?
No, absolutely not. Commercial oven cleaners are way too harsh for toaster oven heating elements. They’re designed for the thick, heavy-duty coatings inside full-size ovens. Using them on your toaster oven can damage the elements, create toxic fumes when heated, and potentially corrode electrical connections. Stick with gentler methods like baking soda paste or the burn-off technique.
Is it normal for heating elements to discolor over time?
Yes, completely normal. Heating elements naturally develop a darker, oxidized appearance as they age and go through heating cycles. This discoloration doesn’t affect performance at all. What you want to watch for is actual buildup—crusty, flaky substances or greasy spots—rather than just color changes in the metal itself.
What if my heating elements still look dirty after cleaning?
Some staining and discoloration is permanent, and that’s okay. You’re aiming for functional cleanliness, not showroom perfection. As long as there’s no flaking buildup, excessive grease, or anything that could smoke or catch fire, your elements are clean enough. If you’ve got stubborn spots that won’t budge, try the burn-off method one more time at 450°F for 20 minutes, then give them a gentle brush once cooled.
Wrapping Up Your Cleaning Session
Cleaning toaster oven heating elements without removing them isn’t just possible—it’s actually the smarter approach. You avoid the risk of damaging delicate connections while still getting your oven clean and functional. Whether you choose the gentle brush method for regular maintenance, the burn-off technique for moderate buildup, or the baking soda paste for tougher jobs, you’ve got options that work.
Remember, the key is patience and regular attention. A few minutes of maintenance after every few uses beats hours of scrubbing down the line. Keep your ventilation good, never use harsh chemicals, and always let everything cool down completely before you start working.
Your toaster oven works hard for you, cooking everything from morning toast to late-night snacks. Give it a little care, and it’ll
Frequently Asked Questions
how to clean toaster oven heating elements without removing them
Clean toaster oven heating elements in place by unplugging the unit and letting it cool for at least 1 hour before applying any cleaning solution. Use a soft brush or damp cloth to gently remove debris, as the elements do not need to be removed for effective cleaning. This method protects the wiring connections and keeps your warranty intact.
how long does it take for toaster oven heating elements to cool down
Toaster oven heating elements can take at least 1 hour to cool down completely after use, and sometimes longer depending on the model and how long it was running. Never begin cleaning immediately after use, as the elements retain heat much longer than the exterior suggests. Always unplug the unit from the wall outlet before waiting for it to cool.
what happens if you remove toaster oven heating elements to clean them
Removing toaster oven heating elements risks damaging the wiring connections and can create hot spots or fire hazards if they are not reassembled correctly. Most heating elements are not designed for user removal and require specific mounting configurations to function safely. Attempting removal can also void your manufacturer warranty.
what should you remove from a toaster oven before cleaning
Before cleaning a toaster oven, remove the crumb tray, wire racks, and any baking pans and wash them separately in warm, soapy water in the sink. Removing these parts first gives you better access to the heating elements and interior walls. Place newspaper or old towels under the toaster oven to protect your countertop from mess during the cleaning process.
is it safe to clean toaster oven heating elements yourself
Yes, it is safe to clean toaster oven heating elements yourself as long as the unit is fully unplugged and cooled for at least 1 hour before you begin. The key is keeping the elements in place rather than attempting to remove them, which eliminates most safety risks. Using gentle cleaning tools like a soft brush or damp cloth prevents damage to the delicate coils.

Written by
Emma founded Toastera to turn vague appliance advice into clear, researched, safety-first guidance on toasters and toaster ovens.
Free: the Toaster Oven Cheat Sheet
Get the printable cheat sheet (temps, cook times & safety tips) plus new recipes. No spam, unsubscribe anytime.