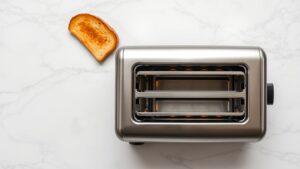
To make quesadillas in a toaster oven, preheat to 425°F, assemble your quesadilla on a foil-lined tray, and bake for 8 to 10 minutes until the tortilla is golden and the cheese is fully melted. The direct, dry heat of a toaster oven crisps the tortilla far better than a microwave and doesn’t require you to babysit a skillet. You get a crunchier result than stovetop in a lot of cases, especially if you flip halfway through.
Safety First: Toaster ovens run hot — up to 450°F on some models — and the interior walls, racks, and trays stay dangerously hot long after cooking. Always use oven mitts rated for high heat when removing trays or adjusting the rack. Don’t leave the toaster oven unattended while cooking anything with oil or cheese, as drips can smoke or ignite. Keep the crumb tray clean to reduce fire risk, and never line the interior walls or heating elements with foil.
Quick Facts
- Best temperature: 425°F (some thicker tortillas do better at 400°F for a slightly longer bake)
- Cook time: 8–10 minutes for a flat, open-faced quesadilla; 6–7 minutes for a folded half-moon on the rack
- Flipping halfway through — around the 4-5 minute mark — is what actually gets both sides crispy
- Low-moisture cheese (like Monterey Jack or a Mexican blend) melts more evenly and doesn’t make the tortilla soggy
- A wire rack gives a crispier bottom than a solid tray; a foil-lined tray makes cleanup easier but can steam slightly underneath
I’ve made quesadillas every way imaginable. Skillet, microwave, the questionable “put it in the regular oven and forget about it for 15 minutes” method. The toaster oven is genuinely my go-to now, not because it’s flashy, but because it’s consistent and it doesn’t heat up my whole kitchen in July. Here’s exactly what I do, what I’ve messed up, and a few things none of the basic recipes bother to mention.
What You Need Before You Start
You don’t need much. A toaster oven, obviously. A tray or rack. Tortillas, cheese, and whatever filling you want. That’s it. But a couple of gear choices actually matter here.
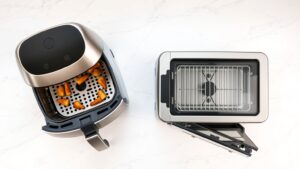
Tray vs. Rack: Does It Really Matter?
Short answer: yes. A toaster oven wire rack lets hot air circulate underneath the tortilla, which gives you a crispier bottom — closer to what you’d get in a skillet. A solid tray lined with foil is easier to clean (cheese drips are inevitable) but the underside of the tortilla can end up a little soft and slightly steamed. I use the wire rack when I actually care about texture, and the foil-lined toaster oven baking pan when it’s a Tuesday night and I don’t want to scrub anything.
Tortilla Size and Type
Standard 8-inch flour tortillas fit most toaster ovens without trimming. Ten-inch ones are a squeeze in compact models — I’ve had the edge fold up against the heating element, which is not ideal. Corn tortillas work but they’re more brittle and crack when you fold them; if you want to go corn, do a flat, open-faced style with two separate tortillas stacked. And skip the low-carb wraps for this method. They don’t crisp, they just get leathery and slightly sad.
The Method: Step by Step
This is the approach I’ve landed on after testing it probably thirty-odd times. Straightforward, but the details are worth reading.
Step 1 – Preheat (Don’t Skip This)
Preheat your toaster oven to 425°F. Give it a full 5 minutes. Toaster ovens are smaller than full ovens and heat up faster, but a lot of people throw food in immediately and wonder why the result is uneven. The residual cold air in the cavity matters more in a small space. For a slightly softer result — like if you’re using a thicker, restaurant-style tortilla — drop to 400°F and add a minute or two.
Step 2 – Assemble Flat on the Tray
Lay one tortilla flat on your tray or rack. Add cheese first — I use about ½ cup of shredded Monterey Jack for a single quesadilla, spread evenly but not all the way to the edges. Then whatever fillings you want. Then fold the tortilla in half, or put a second tortilla on top if you’re doing a full round.
One thing I messed up early on: overloading with fillings. Wet ingredients — salsa mixed into the filling, fresh tomatoes, anything with high moisture — turn the inside soggy before the outside crisps. Add those things after cooking, not inside. Roasted chicken, caramelized onions, black beans, pickled jalapeños — all fine inside. Raw tomato, sour cream, fresh salsa — serve on the side.
Step 3 – Bake at 425°F for 8 to 10 Minutes, Flip Once
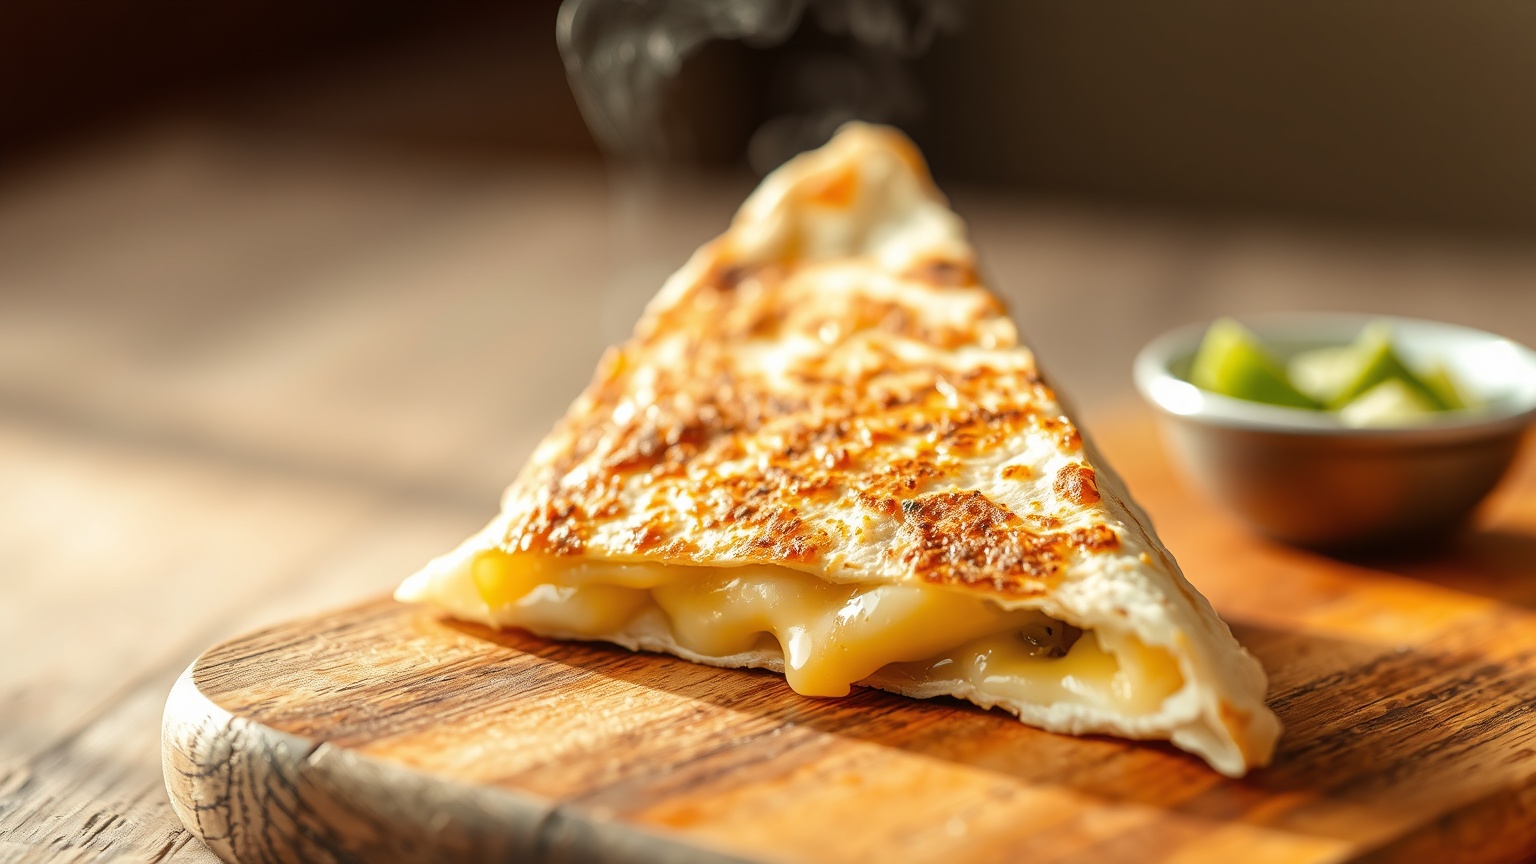
Slide it in on the middle rack position. Set a timer for 4 to 5 minutes, then flip the quesadilla carefully with a spatula and cook another 4 to 5 minutes. Total time is 8 to 10 minutes. You’re looking for a tortilla that’s golden-brown with some darker spots — not pale, not charred. The cheese should be fully melted and starting to bubble at the edges.
If your toaster oven has a convection fan, use it. It takes about a minute off the total time and gives a noticeably better crisp. I’d say convection at 425°F for 7 to 8 minutes total is the sweet spot on the models I’ve tested. Check your toaster oven’s quirks if you’re not sure — some mini toaster ovens run hot and will brown faster than the dial suggests.
The “Toast” Setting: Is It Worth Using?
Some recipes suggest using the toast setting on a folded quesadilla placed directly on the rack. It works, and it’s fast — one toast cycle does a decent job browning the outside. But I find the cheese doesn’t get as fully melted, especially if your filling is cold from the fridge. The bake method at 425°F gives you more control and more consistent results. The toast setting is a decent shortcut; it’s not my preference.
Cheese and Filling Combinations That Actually Work
Cheese choice matters more than people think. Pre-shredded cheese has an anti-caking coating (usually cellulose or potato starch) that slightly inhibits melting. Shredding your own Monterey Jack or Oaxacan cheese from a block will get you a noticeably smoother melt. That said, the bagged Mexican blend is convenient and works fine — I use it most of the time, honestly.
Avoid fresh mozzarella here. Too much water content. It’ll make the tortilla soggy and you’ll be disappointed. Aged cheddar melts okay but can get a little greasy. My personal ranking: Monterey Jack first, Mexican blend second, pepper jack if you want heat, and a mix of Oaxacan and cheddar if you’re feeling like it matters (it does taste better).
For protein fillings, leftover rotisserie chicken is the easiest. Canned black beans, drained and patted dry. Thinly sliced steak that’s already cooked. All of these work well because they’re already cooked — you’re just heating them through. Raw proteins don’t cook fully in the time it takes to crisp the tortilla, so don’t try to use raw chicken or uncooked shrimp inside the quesadilla. The USDA recommends chicken reach 165°F internally, and you can’t reliably get there in 8 minutes inside a folded tortilla.
Toaster Oven Settings at a Glance
Different toaster oven modes affect your result in distinct ways. Here’s a quick breakdown of what I’ve found in testing:
| Setting | Temp | Time | Result | Best For |
|---|---|---|---|---|
| Bake | 425°F | 8–10 min | Crispy top and bottom, fully melted | Most reliable all-around method |
| Bake + Convection | 425°F | 7–8 min | Extra crispy, faster browning | Best texture if your oven has it |
| Toast (on rack) | Auto | 1 cycle | Good browning, less even melt | Quick single quesadilla, folded |
| Broil | 450–500°F | 3–4 min/side | Very fast, charring risk | Open-faced finishing only |
| Bake | 400°F | 10–12 min | Softer, more even melt | Thicker tortillas or filled ones |
Edge Cases Nobody Talks About
Frozen Quesadillas
If you’re cooking a frozen store-bought quesadilla (or one you assembled and froze yourself), add about 4 minutes to the total bake time and don’t skip the flip. Start at 375°F for the first half to let it thaw through, then crank to 425°F for the last 5 minutes to crisp it up. Going straight to high heat on a frozen quesadilla gives you a burned outside and a cold, half-melted inside.
Multiple Quesadillas at Once
Most full-size toaster ovens can fit two folded half-moon quesadillas side by side on the rack. Don’t stack them or overlap the edges. If you’re making more than two, do them in batches — the ones that wait in the oven with the heat off will stay warm for a few minutes while the next batch cooks. Cramming a third one in there drops the air circulation enough to noticeably affect the crisping. I’ve tried. It’s not worth it.
Reheating a Leftover Quesadilla
The toaster oven is actually the best way to reheat a quesadilla — better than a skillet, miles better than a microwave. Set it to 350°F and heat for 5 to 6 minutes, flipping once. It comes back surprisingly close to fresh. I wrote more about this in my guide to reheating food in a toaster oven if you want the full rundown on other foods too. The microwave makes it rubbery; don’t do it to yourself.
Serving and Cutting Without Making a Mess
Let the quesadilla rest for 60 to 90 seconds after it comes out. Seriously. The cheese is liquid at this point and if you cut it immediately, everything slides out and the tortilla goes limp. A minute of resting lets the cheese set slightly so you get clean slices. A pizza wheel works better than a knife for cutting — less dragging. Three cuts makes six triangles from a full round; two cuts makes four from a half-moon. That’s it. Not complicated, just worth knowing before you hack into it.
Serve with sour cream, guacamole, or salsa on the side. Serious Eats has a solid guacamole recipe if you want to make it from scratch — it’s the one I actually use. The quesadilla is the main event; don’t skip the dips.
Final Thoughts
The toaster oven quesadilla isn’t a compromise. Done right — 425°F, flipped once, right cheese, dry fillings only inside — it competes with any stovetop version and beats a microwave without contest. The main things that trip people up are skipping the preheat, using wet fillings, and not flipping. Fix those three things and you’ll get a crispy tortilla with melted cheese every single time.
If you’re still shopping for the right appliance, check out my picks for the best mini toaster ovens — some of the compact models are surprisingly capable at this. And if you’re curious about how hot your toaster oven actually gets versus what the dial says, I covered that in detail over at how hot a toaster gets. There’s often a gap. It’s worth knowing.
Frequently Asked Questions
What temperature should I use to make quesadillas in a toaster oven?
425°F is the best temperature for most toaster oven quesadillas — it’s hot enough to crisp the tortilla without burning it before the cheese melts. If your tortillas are thicker or your filling is dense, drop to 400°F and add a couple of minutes. Convection mode at 425°F shaves about a minute off and improves the crisp noticeably.
How long do quesadillas take in a toaster oven?
At 425°F, quesadillas take 8 to 10 minutes total, flipping once at the halfway point. Open-faced on the tray runs a bit longer; folded on the rack is closer to 6 to 7 minutes because heat hits both sides. Frozen quesadillas need 12 to 14 minutes with a lower starting temp.
How do I get my toaster oven quesadilla crispy instead of soft?
Flip the quesadilla halfway through cooking — that’s the single biggest factor. Using a wire rack instead of a solid tray helps a lot because air circulates under the tortilla. Also avoid wet fillings like fresh salsa or tomato inside; they steam the tortilla from the inside and kill the crisp.
Can I make quesadillas in a toaster oven without foil?
Yes — and actually, cooking directly on the wire rack or an unlined tray gives a better result because nothing traps moisture underneath. Foil is purely a convenience for cleanup. If you do use foil, don’t let it cover the tray’s edges or block any vents, and never put foil near the heating elements.
What’s the best cheese for toaster oven quesadillas?
Monterey Jack melts the most smoothly and doesn’t get greasy. A standard Mexican cheese blend from a bag works well and is the most practical option. Avoid fresh mozzarella (too much moisture) and don’t use pre-sliced processed cheese — it melts oddly and tastes like it. Shredding your own from a block will always melt better than pre-shredded.
—
Written by
Emma founded Toastera to turn vague appliance advice into clear, researched, safety-first guidance on toasters and toaster ovens.
Free: the Toaster Oven Cheat Sheet
Get the printable cheat sheet (temps, cook times & safety tips) plus new recipes. No spam, unsubscribe anytime.