To use the rotisserie setting on an air fryer toaster oven combo, thread your food onto the rotisserie spit, secure it with the forks, slide the left end into the motor socket, and rest the right end in the notched bracket — then select the Rotisserie function, set the temperature (usually 350–400°F depending on what you’re cooking), and let the rotation do the work. The spinning motion bastes the food in its own juices continuously, which is why you get that deep, lacquered exterior without any flipping or fussing. The result is genuinely better than static roasting for whole birds and rolled roasts — crispier skin, juicier meat.
Safety First: Rotisserie cooking involves an actively spinning spit at temperatures up to 425°F, hot grease dripping into a catch tray, and a motor running for 60–90 minutes at a stretch. Always use the included spit forks and make sure they’re fully tightened before you start — a loose fork can cause the food to slip and jam the motor or splatter grease onto the heating elements. Never touch the spit rod or forks with bare hands during or immediately after cooking. Keep the drip tray in place for every rotisserie cook to prevent grease fires. If you smell burning or see smoke beyond normal roasting, stop the machine and check the drip tray before continuing.
Quick Facts: Rotisserie on an Air Fryer Toaster Oven Combo
- Most air fryer toaster oven combos handle a whole chicken up to 4–5 lbs on the rotisserie spit — check your manual for the exact limit before you buy a bird
- Typical rotisserie temperature range: 350°F for larger roasts, 375–400°F for whole chicken, and up to 425°F for a crispier skin finish
- The spit rod connects motor-side left, notched bracket right — every major brand (Cuisinart, Ninja, Cosori, Instant) follows this convention
- A 4 lb chicken takes roughly 60–75 minutes at 375°F; always verify with a meat thermometer (165°F at the thickest part of the thigh)
- The drip tray is not optional — grease accumulates fast and will smoke or ignite without it
What the Rotisserie Setting Actually Does (and Why It’s Different From Air Fry)
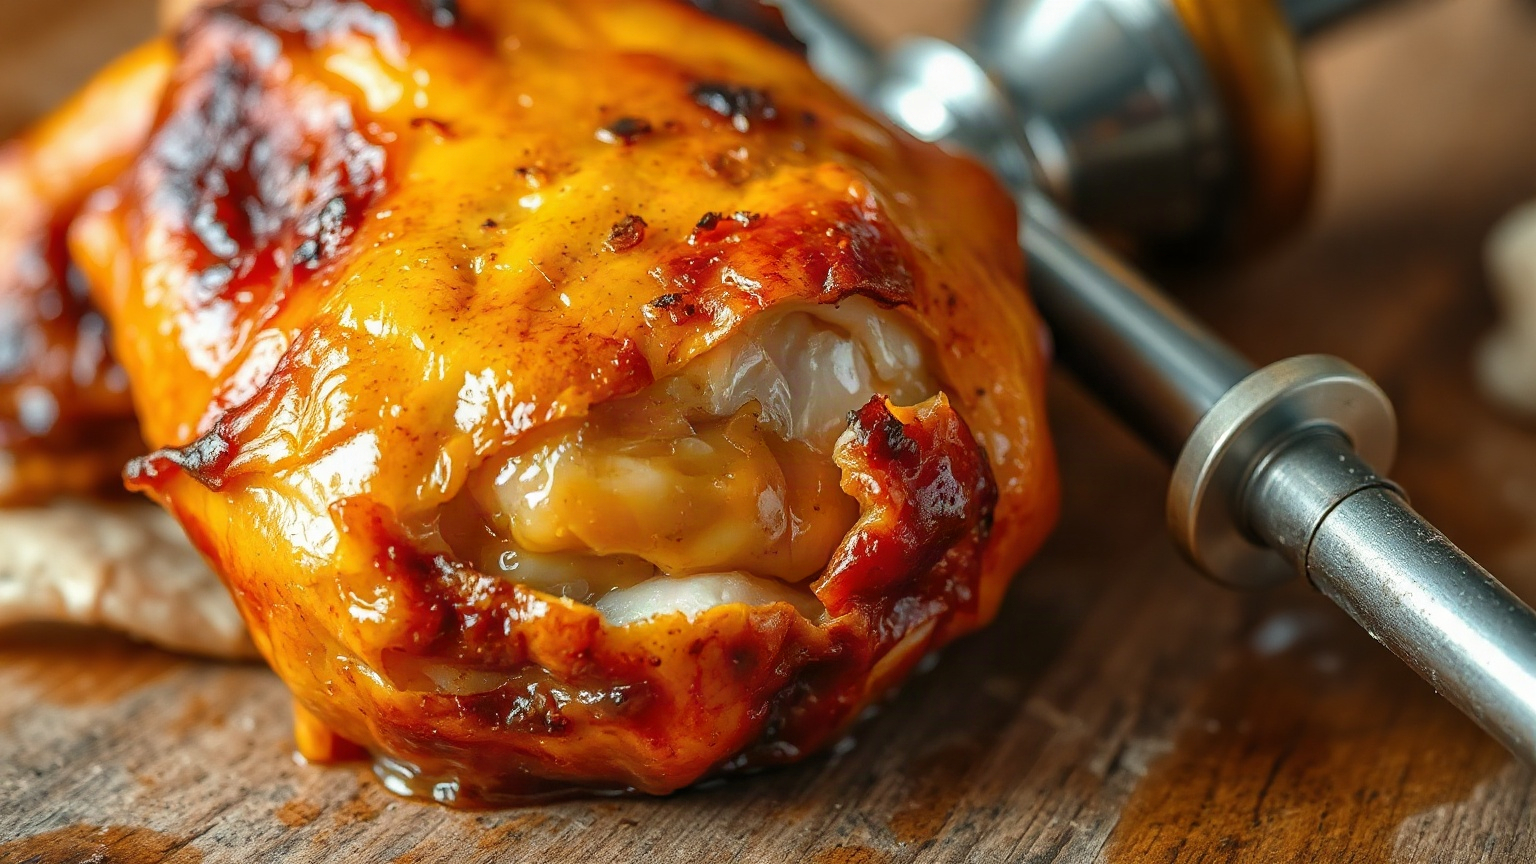
A lot of people assume rotisserie is just air fry with a spinning stick. It’s not quite that simple. When you select the Rotisserie function on most machines, the oven activates its rear heating element and the convection fan simultaneously, while the motor socket on the left interior wall starts turning the spit. The heat wraps around the food from multiple angles, but because the food is rotating — typically at a slow, steady speed, maybe one full revolution every 5–8 seconds — the juices that render out keep basting the surface as it turns. No single side ever sits long enough to dry out.
Air fry mode, by contrast, blasts hot air at high velocity around stationary food. Great for fries, wings, vegetables. But for a whole chicken, it doesn’t self-baste. You end up with the side closest to the heating element browning faster than the rest. Rotisserie solves that without you doing anything.
One thing I didn’t expect when I first used the rotisserie on my Cuisinart TOA-70: the oven runs noticeably hotter near the top during rotisserie mode. The rear element position matters. Just something to be aware of if you’re trying to cook something thick — it’ll color on top before the center is done if you start too high.
Setting Up the Rotisserie Spit: Step by Step
This part trips people up more than the actual cooking. Here’s how it goes.
Threading the Food
Slide one spit fork onto the rod and tighten the thumbscrew so it stays about 2–3 inches from one end. Push the rod through the center of your food — for a whole chicken, you want it running through the cavity along the backbone, not through the breast. Then push the food down until it’s snug against the first fork. Slide the second fork in from the other end, press it firmly into the meat, and tighten. The food should have zero wobble. Genuinely zero. If it rocks at all, retighten both forks.
For a chicken specifically: tie the legs together with kitchen twine and tuck the wing tips back before you thread it. Flopping wings hitting the oven walls mid-rotation is annoying and will burn them. I learned that the hard way on my second rotisserie attempt.
Loading the Spit Into the Oven
Left side first, always. The left wall has the motor socket — it’s usually a square or D-shaped hole. Insert the pointed end of the spit into that socket until it clicks or seats firmly. Then guide the right end down into the notched cradle or bracket on the right wall. You’ll hear a small settle. Put the drip tray on the rack below the spit position. Close the door, select Rotisserie, set your temperature and time, and hit start. The spit should begin turning within a second or two.
If it doesn’t start turning, open the door, reseat the left end in the motor socket, and try again. A misaligned motor connection is the most common reason the spit just sits there.
Accessories Worth Having
Most combos come with the spit and two forks. Some include a rotisserie basket — a small wire cage that clips to the spit rod — which is fantastic for smaller things that’d fall off a fork: chicken wings, small potatoes, Brussels sprouts. It’s one of those accessories that sounds gimmicky until you use it once. After that, you use it constantly. If yours didn’t come with one, you can find a rotisserie basket attachment for toaster ovens on Amazon that fits most standard spit rods.
Temperatures and Times for Common Rotisserie Foods
Here’s the reference I wish I’d had when I started. These are the settings that have actually worked for me, not just the defaults in a manual.
| Food | Weight / Size | Temperature | Approximate Time | Internal Temp Target |
|---|---|---|---|---|
| Whole chicken | 3.5–4.5 lbs | 375°F | 60–80 min | 165°F (thigh) |
| Whole chicken (crispier skin) | 3.5–4.5 lbs | 400°F for last 10 min | 50 min at 375°F + 10 min at 400°F | 165°F (thigh) |
| Pork loin roast | 2–3 lbs | 350°F | 55–70 min | 145°F |
| Leg of lamb (boneless, rolled) | 2–3 lbs | 350°F | 60–75 min | 145°F (medium) |
| Beef roast (ribeye/sirloin) | 2–2.5 lbs | 325°F | 50–65 min | 130–135°F (medium rare) |
| Rotisserie basket: wings | 1.5–2 lbs | 400°F | 25–30 min | 165°F |
| Rotisserie basket: vegetables | 1–1.5 lbs | 390°F | 18–22 min | Tender + charred edges |
The USDA’s recommended safe internal temperatures are what I use as my baseline — not the cook time. Time is an estimate. A thermometer is the truth. I use an instant-read thermometer every single time without exception.
One Thing the Guides Don’t Tell You: The Seasoning Method Matters
Wet marinades will drip off and smoke in the catch tray. A dry rub — especially one with a little baking powder mixed in — sticks to the skin and crisps dramatically better during rotation. I use about 1 tsp of baking powder per tablespoon of seasoning for chicken skin. The difference is real. Serious Eats has a good breakdown of why dry brining works so well for poultry skin, and the same logic applies here.
Common Problems and How to Fix Them
Smoke During Cooking
Smoke means grease is hitting the heating element, not sitting in the drip tray. Check that the drip tray is positioned directly under the spit, not pushed to the back or front. If you’re cooking at 400°F or above, add a small amount of water to the drip tray — just enough to cover the bottom — and it’ll prevent drippings from burning before they cool. Not a lot of water. A quarter cup is fine.
Uneven Browning
If one side is browning faster than the other despite the rotation, your food isn’t balanced on the spit. Center of gravity matters. A chicken with more breast meat than thigh will always pull slightly forward. Counterintuitively, you can reposition the forks slightly off-center to compensate, but the easier fix is just to trust the rotation and accept that minor variation is normal. Perfect symmetry isn’t the goal — crispy skin and cooked-through meat is.
The Edge Case Most Guides Miss: Frozen Protein on the Rotisserie
Every guide I’ve seen assumes you’re starting with fully thawed meat. But I’ve tested what happens with a partially frozen chicken — not intentionally, just because I forgot to take it out the night before. The result: the exterior cooks and browns while the interior is still cold, meaning you hit 165°F nowhere near on schedule. The fix is actually simple. Start the rotisserie at 325°F for the first 20 minutes, then bump to 375°F for the remainder. It gives the center time to come up before the outside over-browns. This works. I’ve done it twice now. Still verify with a thermometer, obviously.
Cleaning Up After Rotisserie Cooking
This is the part people dread, and honestly, it’s not that bad if you deal with it while things are still warm. Not hot — warm. The grease in the drip tray comes out easily when it’s fluid, but if you let it cool and solidify, you’re scraping.
The spit rod and forks: soak them in hot soapy water for 20 minutes, then scrub. The thumbscrews on the forks trap grease, so use a toothbrush or a small bottle brush on them. The interior walls of the oven will have splatter — wipe those down with a damp cloth while warm. Avoid spraying anything directly onto the heating elements or the motor socket on the left wall.
For the oven floor and door, a paste of baking soda and water works well on baked-on grease. Let it sit 10 minutes, then wipe off. If you’re looking for a replacement drip tray liner for your toaster oven, they’re cheap and genuinely worth having a few spares. I line mine with foil when I know I’m doing a fatty cook — just make sure the foil doesn’t block airflow underneath the spit.
The rotisserie function is one of the higher-mess cooking modes, right up there with fish at high heat. But for the result you get — properly roasted chicken with skin that actually crackles — it’s worth the 10-minute cleanup. I also find it easier to clean up after than reheating food in a toaster oven that’s been sitting in the fridge for three days with leftover sauce baked on.
Getting the Most Out of Your Machine: A Few Extra Tips
Preheat before loading the spit. I know it seems obvious, but a cold start means uneven cooking through the entire cook. Five to seven minutes at your target temperature before sliding in the loaded spit makes a difference, especially for the initial skin-set on chicken.
Don’t open the door more than once mid-cook. Every time you open it, you lose a significant amount of heat and interrupt the convection pattern. Trust the timer, check the temperature at the end.
Let the meat rest after cooking. The spit gets hot and it’s awkward to handle — use the spit removal tool if your oven came with one (it’s a forked hook), slide the rod onto a cutting board, and leave the chicken on the spit for 10 minutes before unsecuring the forks. It’ll rest and stay juicier. This is the step I consistently see skipped in tutorials and it makes a real difference to the final texture.
If you’re shopping and haven’t bought your machine yet, it’s worth checking out our take on the best mini toaster ovens — some of those compact models do have rotisserie functions, though the spit capacity is smaller (think cornish hens rather than a full chicken).
The Part That Makes It Worth It
Rotisserie cooking is one of those techniques that sounds fancier than it is. Once you’ve done it once — threaded the bird, seated the spit, heard the motor kick in — it clicks. The machine does almost everything. You just need to prep the food properly, set the right temperature, and use a thermometer at the end. That’s it.
The payoff is real. A rotisserie chicken from your own kitchen, done at 375–400°F with a dry rub and a proper rest, is genuinely better than most grocery store rotisserie birds. The skin is crispier, the seasoning goes deeper, and you don’t have to wonder what’s in the basting solution. For me, that makes the setup and cleanup completely worth it — and I’m someone who usually gravitates toward lower-effort weeknight cooking. This one earns its extra steps.
Frequently Asked Questions
How long does it take to rotisserie a whole chicken in an air fryer toaster oven?
A whole chicken between 3.5 and 4.5 pounds takes approximately 60–80 minutes at 375°F on the rotisserie setting. Always verify doneness with an instant-read thermometer — you’re looking for 165°F in the thickest part of the thigh, away from the bone. Time varies based on your specific machine and how cold the chicken was going in.
What temperature should I use for rotisserie cooking in a toaster oven combo?
For most proteins, 350–375°F is the standard starting temperature — low enough that the inside cooks through before the outside burns, high enough to render fat and crisp skin. For the last 10 minutes of cooking, bumping to 400–425°F gives chicken skin a noticeably crispier finish. Beef roasts do well at 325°F throughout.
Why is my rotisserie chicken not crispy on the outside?
The most likely cause is moisture — either from a wet marinade dripping off during cooking or from not drying the skin thoroughly before seasoning. Pat the chicken completely dry with paper towels, apply a dry rub (not a wet marinade), and consider mixing in a small amount of baking powder with your seasoning. The baking powder raises the skin’s pH and helps it crisp dramatically better during the rotation.
Can I use the rotisserie setting without the spit — just placing food on a rack?
You can select the Rotisserie function without a spit loaded, and the oven will run the rear element and fan in rotisserie mode — it won’t damage anything. But without the spit rotating, you lose the main benefit of the setting. For static roasting, the standard Roast or Bake setting with convection is a better match, and you get the same heat without the motor running unnecessarily.
What can I cook on the rotisserie besides whole chicken?
Pork loin, boneless leg of lamb, rolled beef roasts, and even large sausages all work well on a spit. If your oven came with a rotisserie basket attachment, you can cook chicken wings, shrimp, Brussels sprouts, and small potatoes — anything that’d fall off a fork but benefits from constant tumbling in the heat. The basket is the underrated part of the whole setup.

Written by
Emma founded Toastera to turn vague appliance advice into clear, researched, safety-first guidance on toasters and toaster ovens.
Free: the Toaster Oven Cheat Sheet
Get the printable cheat sheet (temps, cook times & safety tips) plus new recipes. No spam, unsubscribe anytime.