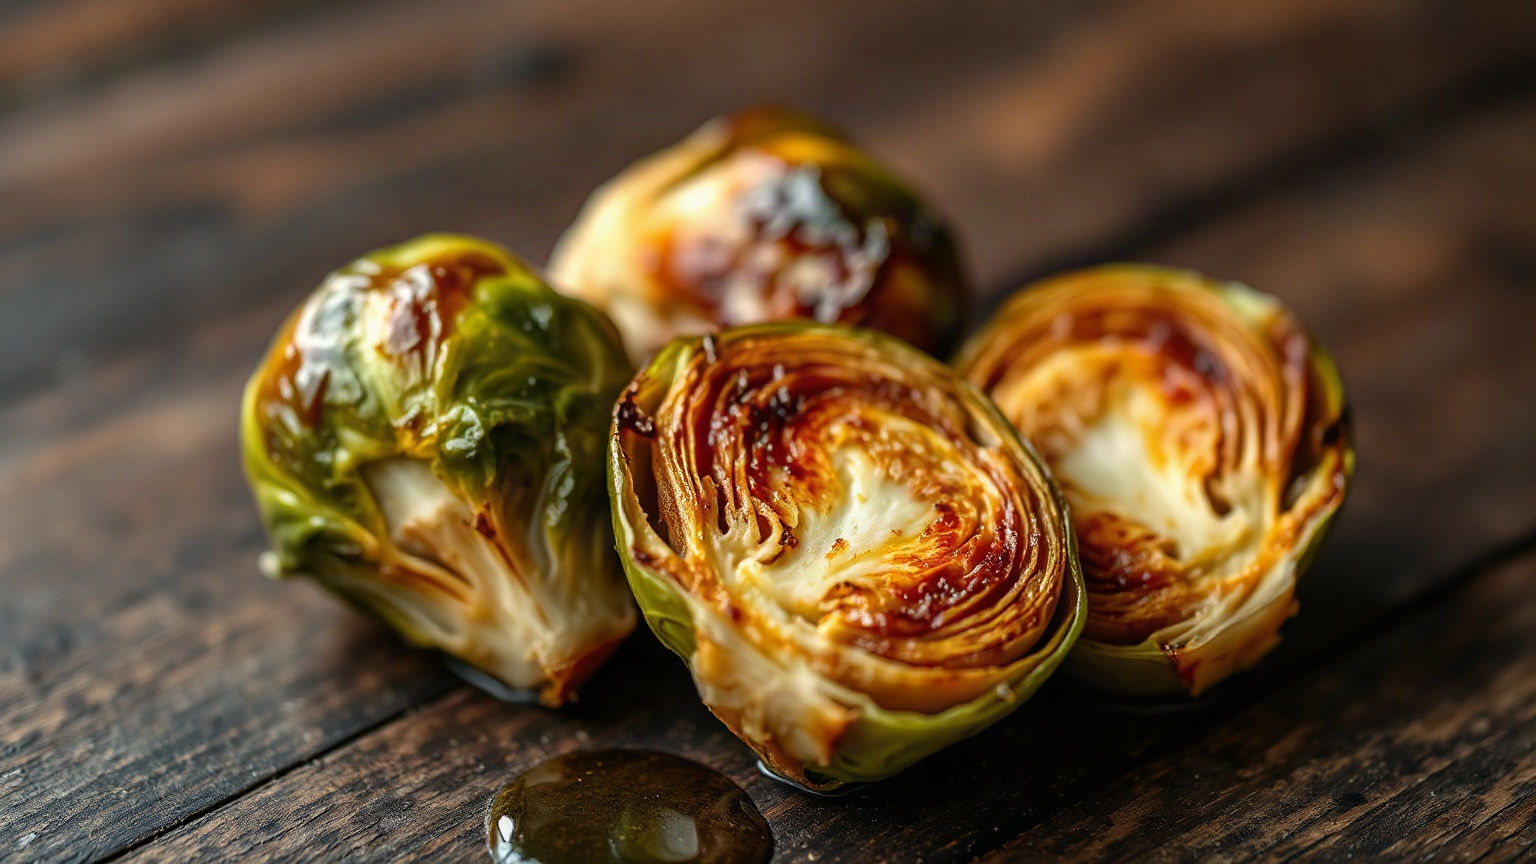
Roast brussels sprouts in a toaster oven at 400°F for 20–25 minutes, cut-side down on a preheated pan, flipping once halfway through. The smaller cavity of a toaster oven actually works in your favor here — it runs hotter and more concentrated than a full-size oven, which means better browning without cranking the dial. Just don’t crowd the pan, or you’ll steam them instead of roast them, and that’s how you end up with soft, sad little cabbages.
Safety First: Toaster ovens run extremely hot and the exterior walls can reach burn temperatures within minutes. Keep the oven at least 4 inches from walls and cabinets, never line the bottom tray with foil (it can cause overheating or fire), and always use oven mitts when pulling out the pan — the rack and pan will be genuinely dangerous to touch. Don’t walk away with oil dripping onto the heating elements.
Quick Facts
- Best toaster oven temp for brussels sprouts: 400°F (convection) or 425°F (no convection)
- Total roasting time: 20–25 minutes, flipping once at the 12-minute mark
- Cut-side down on a preheated pan = the single biggest difference between crispy and soggy
- Max one layer, no touching — overcrowding is the #1 mistake
- Pat them dry before oiling. Moisture is the enemy of a good sear.
Why Toaster Ovens Are Actually Good for This
Most people think of a toaster oven as a compromise appliance. Like, you use it when you don’t want to heat up the whole kitchen. And yes, that’s true. But for vegetables — brussels sprouts especially — the compact size is genuinely useful, not just convenient.
Here’s the thing: a toaster oven’s heating elements are close to the food. The hot air doesn’t have to travel as far. That means faster browning and a more intense dry heat at the surface, which is exactly what you want for crispy sprouts. A big oven with a half-empty cavity can actually take longer to get the same caramelization.
That said, toaster ovens do run a bit inconsistent. Mine (a mid-range Cuisinart) runs about 15–20 degrees hotter than the dial says. I found that out the hard way — set it to 425°F my first time and pulled out some very committed little charcoal spheres at the 25-minute mark. Now I use an oven thermometer. It’s a $10 fix and worth every penny.
If you’re in the market for a reliable unit, check out our picks for the best mini toaster ovens — there’s a real range in how accurately they hold temperature.
The Exact Method: Temperature, Time, and Technique
Prep the Sprouts First
Trim the bottom stems and peel off any yellowed outer leaves. Cut them in half, through the stem — that flat cut side is your best friend, because it’s where the browning happens. Rinse them if you need to, but then actually dry them. Paper towels, a clean dish towel, whatever. Wet sprouts steam instead of roast. That’s just physics.
Once they’re dry, toss with olive oil. I use about 1.5 tablespoons per pound. Not more. Too much oil and they get greasy rather than crispy. Salt generously — this is not the place to be shy — and black pepper. That’s all you need to start. Flavor variations come later.
Preheat the Pan (This Step Matters More Than People Think)
Put your toaster oven baking pan in the oven while it preheats. Let it get hot. Then when you drop the sprouts on, cut-side down, you get an immediate sear on that flat surface instead of a slow, sorry steam. This is the step most recipes skip and it makes a noticeable difference.
Set your toaster oven to 400°F. If it has a convection setting, use it — convection circulates air and speeds up browning significantly. With convection, 400°F is plenty. Without convection, bump it to 425°F.
Timing Breakdown
| Toaster Oven Setting | Temperature | Time (Total) | Flip At |
|---|---|---|---|
| Convection Bake | 400°F | 20–22 minutes | 10–11 min mark |
| Regular Bake | 425°F | 23–27 minutes | 12–13 min mark |
| Air Fry (if available) | 375°F | 15–18 minutes | 8 min mark |
| Convection (smaller sprouts) | 400°F | 16–18 minutes | 8–9 min mark |
When you flip them at the halfway mark, look at the cut sides. You want to see golden-brown edges, maybe a little char on the outermost leaves. If they’re still totally pale, your oven might be running cold — give them another 3 minutes before flipping. Done is when the outer leaves are crispy and the stem end pierces easily with a fork.
The Crowding Problem (And Why Your Last Batch Was Soggy)
This is the one. If your brussels sprouts came out soft and steamed-tasting, I’d bet money they were too close together on the pan. Each sprout releases moisture as it cooks. If there’s no space between them, that steam has nowhere to go — it just hangs around and poaches everything.
Toaster oven pans are small. One pound of sprouts usually maxes out a standard toaster oven tray. If you’ve got more than that, do two batches. Yes, it takes longer. The alternative is mediocre sprouts, and that’s not worth it.
If you want even better airflow, use a toaster oven wire rack set over the pan. Air circulates underneath, and you get browning on more surface area. I’ve done this with and without a rack, and the rack version does come out noticeably crispier — it’s just fussier to clean.
Flavor Variations That Actually Work
Once you’ve got the base method down, there’s a lot of room to play.
With Bacon
Toss in a few strips of bacon cut into lardons (small chunks, not crumbles — crumbles burn). The fat renders out and bastes the sprouts as they roast. Pull everything at the same time. The bacon fat also makes the cut sides extra crispy, which is pretty great. I’d say this is my favorite version, though I don’t make it often because it’s a bit much on a Tuesday night.
Balsamic Glaze
Don’t add it before roasting. Balsamic burns. Drizzle it on in the last 4–5 minutes, or just add it after. Same idea with honey — it scorches at high heat. Add sweet things at the end.
Parmesan
Scatter grated parm over the top in the last 3 minutes. It melts, crisps up a little, and sticks to the outer leaves in the best possible way. This is the version I make when I’m trying to convince someone they like brussels sprouts. Works almost every time.
The Edge Case Most Recipes Ignore: Frozen Brussels Sprouts
Fresh is better. But frozen works, and nobody talks about how to actually do it right. Do not thaw them in the microwave first. Instead, roast them from frozen — spread on the pan, 400°F convection, and give them 30–35 minutes. They’ll release a lot of liquid in the first 15 minutes. Don’t panic. Keep going. Once that moisture evaporates, they’ll start to brown. You’ll get decent color and a much softer interior than fresh, but they’re totally respectable.
The other edge case: really large sprouts. Anything bigger than a golf ball should be quartered, not halved, or the outside will overcook before the center is done. Small sprouts — like the tiny ones you sometimes get at a farmers market — barely need 15 minutes. Keep an eye on size.
For more on using your toaster oven as a full cooking tool (not just toast), see our guide to reheating food in a toaster oven — a lot of the same principles apply.
A Note on Oil and Why It Matters
Use olive oil for this. I know some people are very into avocado oil for high-heat cooking, and if that’s what you’ve got, it works. But the smoke point of olive oil is around 375–405°F, which is right where we’re cooking — and at 400°F with a well-ventilated toaster oven, you’re not going to have a problem. Serious Eats has a good breakdown of roasted brussels sprouts technique if you want to go deep on the food science.
Whatever you use, coat every surface. Uncoated dry spots don’t roast — they just dry out and go bitter. Toss properly in a bowl before spreading on the pan.
The Finish Line
Good toaster oven brussels sprouts aren’t complicated. They do require attention to a few specific details: dry sprouts, hot pan, one layer, right temp, and a flip at the halfway point. Skip any of those and you’ll notice. Do all of them and you’ll get caramelized, slightly crispy sprouts in under 30 minutes without heating up your whole kitchen.
I’ve made these probably forty times at this point, in three different toaster ovens. The method above works across all of them, with minor time adjustments for oven personality. Get an oven thermometer if you haven’t already. It changes everything about cooking in a toaster oven, not just for vegetables.
Frequently Asked Questions
What temperature should I roast brussels sprouts in a toaster oven?
400°F with convection, or 425°F without. Toaster ovens with convection circulate air more efficiently, so you don’t need as much heat — and you’ll still get great browning. If your toaster oven tends to run hot (many do), stick with 400°F regardless and check early.
How long does it take to roast brussels sprouts in a toaster oven?
20–25 minutes at 400°F with convection, or 23–27 minutes at 425°F without. Flip them once at the halfway point. Smaller sprouts can be done in as little as 16 minutes, so size matters — check them a few minutes early if they look small.
Why are my toaster oven brussels sprouts soggy instead of crispy?
Almost always one of three things: they weren’t dried before oiling, the pan was overcrowded, or the oven wasn’t hot enough. Wet sprouts steam rather than roast, and cramped sprouts trap moisture and do the same. Spread them out with cut sides down on a preheated pan, and the texture problem usually solves itself.
Can I roast frozen brussels sprouts in a toaster oven?
Yes, though you’ll need to extend the time to 30–35 minutes. Don’t thaw them first — roast straight from frozen at 400°F convection. They’ll release a lot of liquid early on, which will eventually evaporate and allow browning. The texture won’t be quite as crispy as fresh, but they’re still very good.
Do I need to use the convection setting for roasting vegetables in a toaster oven?
You don’t need to, but it helps. Convection moves hot air around the food, which pulls surface moisture away faster and speeds up browning. Without it, bump the temperature up by 25°F and add a few extra minutes. Either way works — convection just gets you there faster and with slightly more even color.
—
Written by
Emma is a home cook who loves coaxing big flavor out of a toaster oven — from crispy roasted vegetables to easy weeknight dinners and sweet treats. She develops and tests Toastera's recipes for small-appliance kitchens.
Free: the Toaster Oven Cheat Sheet
Get the printable cheat sheet (temps, cook times & safety tips) plus new recipes. No spam, unsubscribe anytime.