The numbers on a toaster dial control how long the heating element stays on, not how hot it gets — the temperature inside a toaster stays roughly the same regardless of the setting. Higher numbers mean more time exposed to heat, which produces darker, crispier toast. So if your bread keeps coming out pale on 3, nudging it to 4 isn’t cranking up the heat; it’s just giving the bread more time to brown.
Safety First: Toaster heating elements reach temperatures between 300°F and 550°F during a cycle. Never leave a toaster running unattended, keep it away from curtains and paper towels, and always unplug it before cleaning out crumbs — a buildup at the bottom is a genuine fire risk, not just a hygiene issue.
Quick Facts: Toaster Dial Numbers at a Glance
- The dial controls toasting time, not temperature — heat stays roughly constant throughout.
- Most pop-up toasters use a bimetallic strip or a capacitor-resistor circuit to time the cycle, not a digital timer.
- On a typical 2-slice toaster, setting 1 produces lightly warmed bread in roughly 30–45 seconds; setting 6 runs the element for around 2.5–3 minutes.
- Bread thickness, moisture content, and whether the bread is frozen all affect the actual result — same setting, different outcome.
- There’s no universal standard across brands. A “3” on a Cuisinart is not the same as a “3” on a Black+Decker.
What’s Actually Happening Inside the Toaster
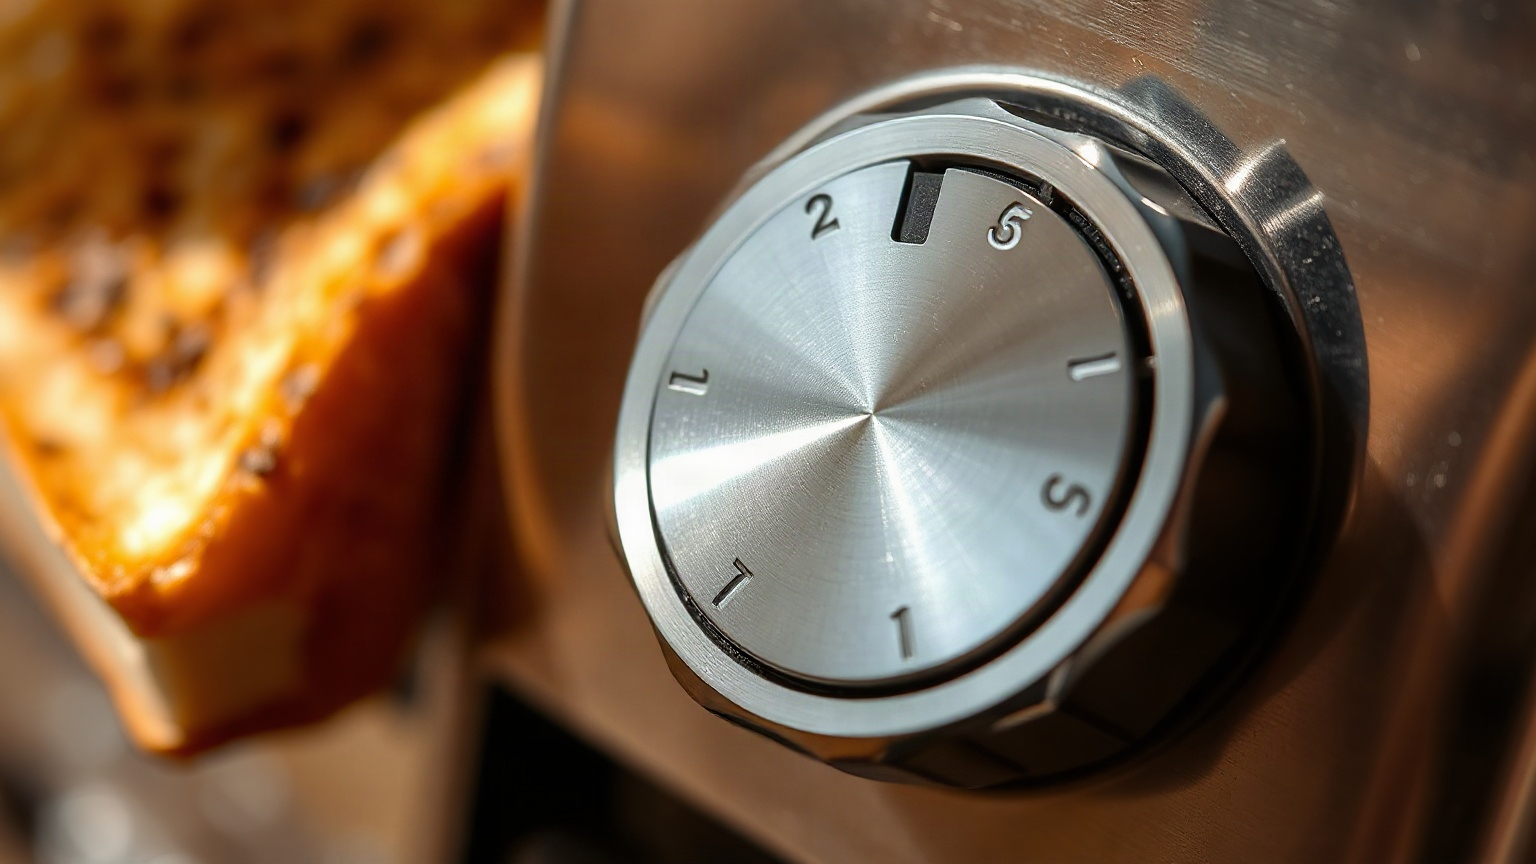
Here’s something that surprised me the first time I thought about it properly: toasters don’t have a thermostat the way your oven does. They can’t lower the temperature for a lighter setting or raise it for a darker one. The nichrome wire heating elements glow at roughly the same temperature — somewhere between 300°F and 550°F depending on the model — every single time you push the lever down. You can read more about that in our breakdown of how hot a toaster gets.
So the dial is a timer. That’s it. Turn it higher, and the element runs longer. Your bread sits in that heat for more time, browns more deeply, and comes out crispier. Turn it lower, and the cycle cuts off earlier.
The clever part is how that timer actually works, and there are two main mechanisms worth knowing about.
The Bimetallic Strip Method
Older and simpler toasters use a bimetallic strip — two metals bonded together that expand at different rates when heated. As the toaster warms up, the strip bends. When it bends far enough, it triggers the pop-up mechanism. The dial adjusts how far the strip has to bend before it trips, which effectively changes how long the cycle runs. It’s mechanical, it’s elegant, and it’s also why a cold toaster on setting 4 will produce slightly lighter toast than a warm toaster on setting 4. The strip is already partially heated on the second round.
The Capacitor-Resistor Circuit Method
Slightly more modern budget toasters (and plenty of mid-range ones) use an RC circuit — a resistor and capacitor — where the capacitor charges up during the toast cycle. When it hits a threshold voltage, it triggers the release. The dial changes the resistance value, which changes how fast the capacitor charges, which changes how long the whole thing takes. This method is less sensitive to ambient temperature than the bimetallic strip, so your second slice tends to come out more consistent.
Neither method is measuring your bread. They’re measuring time and heat accumulation, which is close but not identical.
What Each Number Setting Actually Does to Your Bread
I tested this with standard supermarket white sandwich bread (the medium-thickness kind, nothing fancy) in a 900-watt 2-slice toaster, using the same loaf back to back on each setting. Here’s what I got:
| Setting | Approx. Cycle Time | Result on Standard White Bread | Best For |
|---|---|---|---|
| 1 | ~35–45 seconds | Barely warm, no visible browning, soft throughout | Defrosting or warming stale bread |
| 2 | ~60–75 seconds | Very lightly golden, still quite soft | Sensitive eaters, thin sliced bread |
| 3 | ~90–105 seconds | Evenly golden, slight crunch at edges — this is what most people picture as “toast” | Everyday toast, most bread types |
| 4 | ~2–2.25 minutes | Deeper amber color, noticeably crunchy | Thicker bread, sourdough, bagels |
| 5 | ~2.5 minutes | Dark brown, firm, some char at the corners | People who genuinely like dark toast (they exist) |
| 6 | ~2.75–3 minutes | Very dark, bordering on burnt for standard bread | Frozen bread starting from solid, or very dense artisan loaves |
For what it’s worth, I live on setting 3 to 3.5 for regular bread. Setting 4 for sourdough. I’ve never intentionally used 6 on fresh bread and don’t plan to.
Why the Same Setting Gives Different Results Every Time
This is the part that drives people up the wall, and it’s real. The dial is consistent in what it does mechanically — but the bread isn’t a controlled variable.
Moisture Content
Fresh bread has more moisture than bread that’s been sitting open since yesterday. More moisture means more energy required to brown it. Same setting, paler result with fresh bread versus a day-old slice.
Bread Thickness
Thicker slices absorb heat more slowly at the center. The surface might reach browning temperature while the middle is still cool. This is why a thick-cut sourdough on setting 3 comes out warm but pale — you need to bump it to 4 or 4.5 and accept that the crust will get a little more color than ideal. There’s no perfect fix unless your toaster has a “thick bread” or “artisan” setting.
Toaster Temperature at the Start
As mentioned with the bimetallic strip: if you toast two rounds back to back, the second one will almost always come out darker. The toaster’s interior is already warm. This isn’t a defect — it’s physics. I usually drop my setting by half a notch for a second consecutive round.
Frozen Bread — The Edge Case Most Articles Miss
Here’s something I haven’t seen covered properly elsewhere: frozen bread behaves almost like a different food in the toaster. The ice inside the bread absorbs energy as it melts (latent heat of fusion, if you want to get technical), which delays browning significantly. A frozen slice on setting 4 will often come out with the same color as a fresh slice on setting 2 — still soft in the center, barely browned on the outside.
The fix is to use your toaster’s “defrost” function if it has one — this runs a longer cycle at the same heat. If your toaster doesn’t have that button, go to setting 6 for frozen bread and don’t feel weird about it. It’s not burning; it’s compensating for the ice. This is legitimately why setting 6 exists on most toasters.
I learned this the slow way by repeatedly pulling out lukewarm frozen bread and being annoyed about it before actually thinking through why it was happening.
Brand Differences: Your “3” Is Not My “3”
There’s genuinely no industry standard for toaster dial calibration. A setting 3 on a Cuisinart 2-slice toaster might produce noticeably different results than a setting 3 on a basic Hamilton Beach or a Dualit. The wattage matters: a 900-watt toaster pushes more energy through the element than a 750-watt one, so even if the timer runs for the same duration, the bread browns faster in the higher-wattage model.
Dualit toasters — the heavy British ones that look like they belong in a hotel kitchen — use a manual timer rather than an automatic pop-up mechanism on some models. You literally set the time yourself with a dial measured in minutes and seconds, which at least makes the control explicit. Whether that’s better is a matter of preference. I find the automatic pop-up more practical for morning brain.
The practical upshot: when you get a new toaster, treat the first few uses as calibration. Start at 3, see what you get, adjust from there. Don’t assume your muscle memory from the old toaster transfers.
Getting Consistent Results: A Few Practical Habits
Since the dial is imprecise by nature, consistency has to come from you. A few things that actually help:
- Store bread in a sealed bag to keep moisture consistent between slices — open bags mean drier bread means faster browning.
- Let the toaster cool between sessions if you want predictable results. Or accept that round two will be darker and plan accordingly.
- If you’re toasting something denser than standard sandwich bread — English muffins, bagels, thick sourdough — go a full setting higher than you normally would and check after the first pop.
- For frozen bread without a defrost setting, use setting 5 or 6 and don’t leave the room. You want to catch it before it overshoots.
- Empty the crumb tray regularly. This has nothing to do with the dial, but a crumb buildup at the bottom affects heat distribution and is a genuine fire risk. The Serious Eats toaster guide calls this out too, and they’re right.
If you’re interested in what else you can do with countertop appliances beyond basic toasting, our piece on reheating food in a toaster oven goes into a lot more detail on getting consistent heat for different foods.
And if you’re in the market for something more versatile than a pop-up toaster, our best mini toaster ovens roundup covers some solid options that give you actual temperature control — which makes the “what does the number mean” question irrelevant because you set degrees, not mystery dial positions.
For those who bake in their toaster ovens, a decent toaster oven baking pan makes a bigger difference than most people expect — cheap thin pans warp and brown unevenly.
The Bottom Line
The numbers on your toaster dial are a time control dressed up to look like something more intuitive. Higher number, longer cycle, darker toast. That’s the core of it. The reason it feels inconsistent isn’t that the toaster is broken — it’s that bread is variable and the timer is mechanical, not digital. Once you understand that the dial is adjusting duration and not intensity, you can work with it instead of being confused by it.
My honest advice: find your baseline setting with your usual bread on your specific toaster, write it on a Post-it and stick it somewhere you’ll forget about it within a week. After that, you’ll just know. The dial becomes intuitive pretty fast once you stop expecting it to behave like an oven knob.
Frequently Asked Questions
Do the numbers on a toaster represent minutes?
Not exactly — they represent relative toasting time, but they’re not calibrated to specific minute increments. On most toasters, the full range from 1 to 6 spans roughly 30 seconds to 3 minutes of heating time, but the intervals between numbers aren’t perfectly equal. Think of them as a sliding scale from “barely warm” to “very dark,” not a precise countdown timer.
Why does my second piece of toast always come out darker?
Your toaster’s interior is already warm from the first cycle, so the heating element doesn’t need as long to brown the bread — but the timer runs for the same duration anyway. Toasters with bimetallic strip mechanisms are especially prone to this because the strip starts the second cycle already partially bent. Drop your setting by about half a notch for back-to-back toasting.
What setting should I use for frozen bread?
Use your toaster’s dedicated defrost button if it has one — that’s what it’s there for. If not, go two full settings higher than you’d normally use for the same bread fresh, so typically setting 5 or 6. Frozen bread requires significantly more energy to thaw and brown simultaneously, and lower settings will leave the center cold and the outside barely colored.
Do toaster dial numbers control temperature or time?
They control time, not temperature. The heating elements inside a toaster operate at a fixed temperature — roughly 300°F to 550°F depending on the model — regardless of which number you select. The dial adjusts how long the element stays on before the pop-up mechanism triggers. More time equals more browning, not more heat.
Is a higher toaster setting the same as higher heat?
No — this is the most common misunderstanding about toaster dials. A higher setting means a longer cycle at the same heat, not an increase in element temperature. The nichrome heating elements in a pop-up toaster don’t have a variable heat output the way a gas burner does. If you want genuinely variable temperature control for your bread, a toaster oven with a temperature dial is the right tool.
—
Written by
Emma founded Toastera to turn vague appliance advice into clear, researched, safety-first guidance on toasters and toaster ovens.
Free: the Toaster Oven Cheat Sheet
Get the printable cheat sheet (temps, cook times & safety tips) plus new recipes. No spam, unsubscribe anytime.