Roast brussels sprouts in a toaster oven at 425°F on the Bake or Convection Bake setting for 18–22 minutes, cut side down on a preheated pan, flipping once at the 12-minute mark. High heat is what drives off moisture fast enough to caramelize the outer leaves before the centers turn to mush. Get either of those two things wrong — temperature or pan prep — and you’ll end up with the sad, steamed version nobody actually wants.
Safety First: Toaster ovens run at high heat and have exposed heating elements close to food. When roasting at 425°F, the pan, rack, and oven walls will be extremely hot — use dry oven mitts (not a damp cloth, which conducts heat) every single time you reach in. Don’t line the bottom tray with foil; it can block airflow and, in some models, create a fire risk near the lower heating element. Always pull the rack out before flipping food rather than reaching into a hot oven cavity.
Quick Facts: Toaster Oven Brussels Sprouts
- Temp: 425°F — don’t go lower or they’ll steam instead of roast
- Time: 18–22 minutes total, flip at 12 minutes
- Pan prep: Preheat the pan in the oven — this is the single biggest crispy-vs-soggy differentiator
- Cut side down: Always start them flat side facing the hot pan
- Convection: If your toaster oven has a convection fan, use it — shaves off 3–4 minutes and noticeably improves browning
Why Toaster Ovens Are Actually Great for Brussels Sprouts
I’ll be honest — I started making brussels sprouts in my toaster oven mostly out of laziness. My full-size oven takes 15 minutes to preheat. The toaster oven hits 425°F in about 6–8. For a single pound of sprouts, heating an entire oven felt absurd.
But here’s what I actually found: the toaster oven does a better job on small batches. The compact space means the heating elements are closer to the food, and if your unit has convection, that circulating air is relentless about pulling steam away from the surface. Steam is the enemy of crispy. The faster you drive it off, the better your sprouts get.
The downside is real, though. You can only fit about 12–16 ounces comfortably on a standard toaster oven pan — roughly enough for 2 people as a side. Crowd them, and the moisture has nowhere to go. I made that mistake the first time I tried this and ended up with a pile of soft, greenish blobs. Not good.
For more on what these appliances are capable of thermally, check out how hot a toaster gets — it gives useful context on heating element behavior.
Exact Prep: What to Do Before the Oven Even Turns On
Cutting and Trimming
Trim just the very end of the stem — maybe an eighth of an inch. Too much and the leaves fall apart; too little and the base stays tough. Then cut each sprout in half lengthwise, straight through the stem end. That flat cut surface is where most of your browning happens.
If you’ve got some very small sprouts and some large ones, cut the big ones in thirds. Uneven sizing is the enemy of even cooking. I usually sort mine into two rough size groups and watch the smaller ones more carefully.
Drying Matters More Than You Think
After rinsing, dry them. Really dry them. I spread them on a clean kitchen towel for 10 minutes before oiling. Any surface moisture will steam the sprout instead of letting it sear, and no amount of high heat fully compensates for wet vegetables going onto a pan. This step gets skipped constantly in recipes and it’s where a lot of people silently lose.
Oiling and Seasoning
About 1.5 tablespoons of oil for 12 ounces of sprouts. I use regular olive oil — not extra virgin, which smokes aggressively at 425°F. Avocado oil works well too if you have it. Toss them in a bowl, not on the pan, so every surface actually gets coated. Season with salt and pepper. That’s all you need at this stage.
You can add garlic powder (about half a teaspoon), red pepper flakes, or a little parmesan in the last few minutes if you want. But do the balsamic or honey stuff at the end, after cooking — putting sugary glazes on from the start just burns.
The Exact Temperature and Time — and Why Both Matter
425°F. That’s the number. Not 400, not 375. I’ve tested all three.
At 400°F, you get decent browning after about 25 minutes, but the outer leaves don’t get that deep, slightly charred edge that makes people actually want to eat brussels sprouts. At 375°F, you’re basically just baking them. Fine if you want tender, mild sprouts, but that’s not what we’re going for here.
Here’s the full timing breakdown:
| Setting | Temp | Total Time | Flip At | Result |
|---|---|---|---|---|
| Standard Bake | 425°F | 20–22 min | 12 min | Good browning, crispy cut side |
| Convection Bake | 425°F | 17–19 min | 10 min | Excellent — crispier outer leaves |
| Standard Bake | 400°F | 25–28 min | 15 min | Softer, less caramelization |
| Broil Finish (last 2 min) | 425°F + broil | 20 + 2 min | 12 min | Very crispy outer leaves, watch closely |
The preheated pan is non-negotiable if you want crispy results. Put your toaster oven baking pan in while the oven preheats. When you place the sprouts cut side down on a hot pan, you get immediate contact searing rather than slow steaming. It’s the difference between a griddle and a steam table. The first time I skipped it to save time, the results were noticeably worse — flatter color, softer texture throughout.
The Flip — and Whether You Need It
Yes, flip them. At about the 12-minute mark for standard bake, or 10 minutes for convection. The cut side should be deep golden-brown, maybe with a few very dark edges. If it’s pale, give it another 2 minutes before flipping.
After flipping, the rounded side faces down. The remaining time crisps up the outer leaves and finishes cooking the centers. You want a fork to meet slight resistance — if it slides in with zero pushback, they’re overdone.
The Edge Case Most Recipes Ignore: Frozen Brussels Sprouts
Most recipes assume fresh. But a lot of people have a bag of frozen sprouts and want to know if this works. It does, with modifications.
Don’t thaw them fully — that creates a waterlogged mess. Instead, let them sit at room temperature for 20–25 minutes until they’re just barely thawed on the outside but still firm in the center. Then cut them in half, dry aggressively with paper towels, oil, and roast at 425°F for 25–28 minutes with convection, or up to 32 minutes on standard bake. They won’t brown quite as dramatically as fresh, but they get there.
The other edge case: very large sprouts (the golf ball-sized ones). Cut those into quarters, not halves. More surface area, faster moisture release, better texture. Halving a large sprout gives you a thick, dense chunk that stays raw in the center while the outside burns.
Flavor Variations Worth Actually Trying
Balsamic Glaze
Drizzle 1–2 teaspoons of balsamic glaze over the sprouts immediately after pulling them from the oven. The residual heat does the work. Adding it during cooking just burns the sugars black.
Parmesan Crust
Scatter finely grated (not shredded — grated) parmesan over the sprouts in the last 3 minutes of cooking. It melts, crisps, and sticks to the flat cut face. This is my personal favorite version. The cheese gets slightly nutty and bitter at the edges and it works really well.
Garlic and Lemon
Add thinly sliced garlic cloves to the pan with the sprouts. They’ll crisp up and go slightly golden — not burnt if sliced thin. Squeeze half a lemon over everything right before serving. Serious Eats has a good breakdown of why acid added at the end (not during roasting) brightens roasted vegetables without making them limp.
Pan and Rack Setup in a Toaster Oven
Rack position: middle, always. Top rack puts the sprouts too close to the upper heating element and the outer leaves burn before the centers cook through. Bottom rack keeps too much distance and reduces browning.
If your toaster oven came with a toaster oven wire rack, you can set it inside the baking pan to elevate the sprouts slightly and let hot air circulate underneath. It helps on convection models especially. The pan catches any drips.
Single layer. Every time. I know it’s tempting to pile on a few more sprouts, but anything overlapping will steam rather than roast. If you have more than fits, do two batches. The second batch takes no extra effort and the results are genuinely different — not slightly different, noticeably different.
And if you’re using your toaster oven for other dishes too, the article on reheating food in a toaster oven has some useful notes on keeping temperatures consistent between uses. Also, if you’re still shopping for the right machine, the rundown of the best mini toaster ovens covers which models actually hold 425°F accurately without wild temperature swings.
When They’re Done: What to Look For
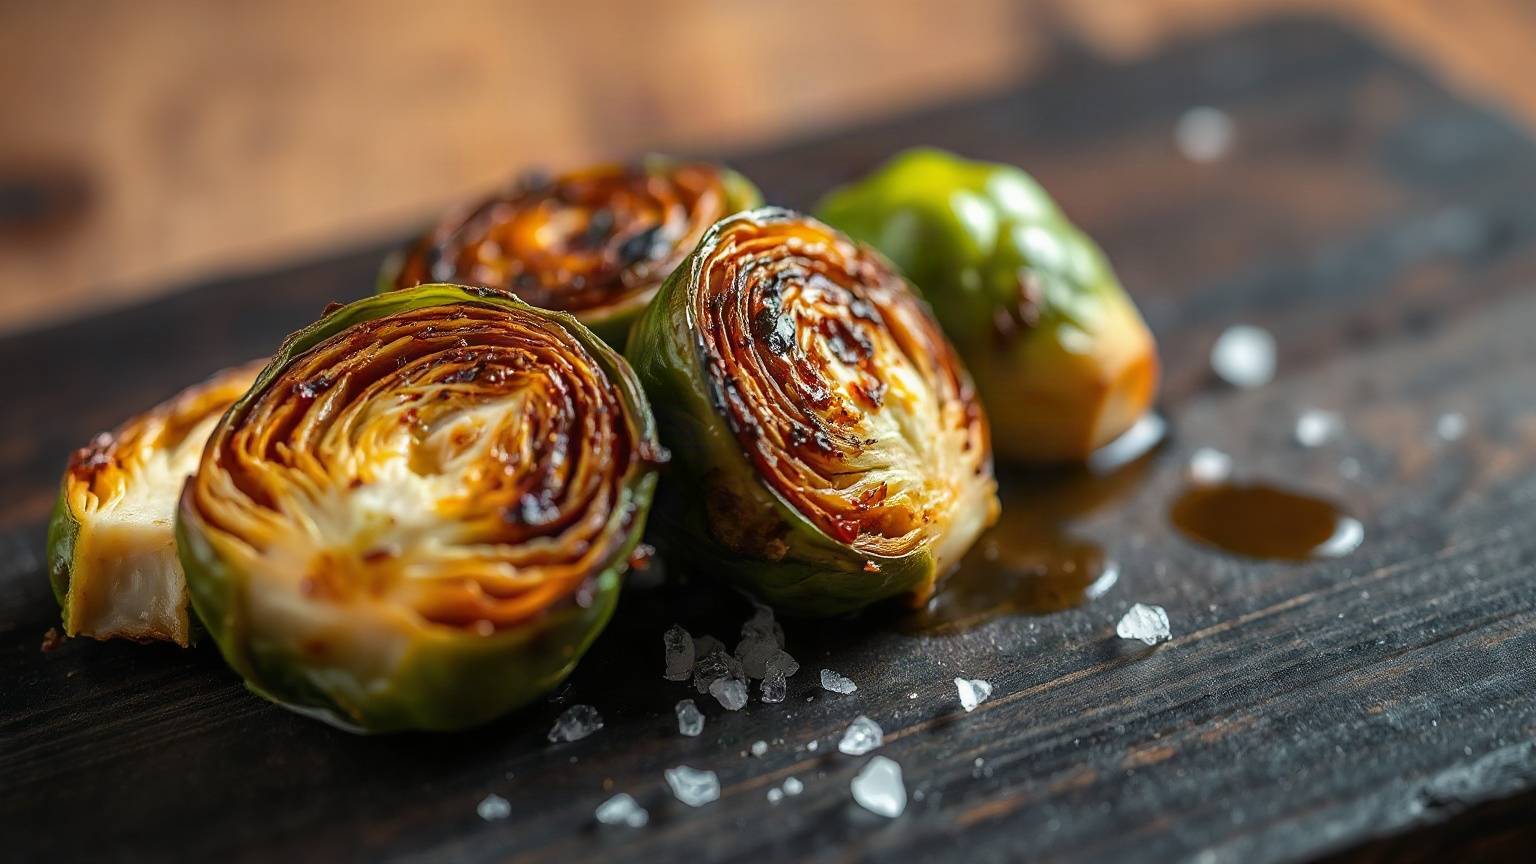
Cut side should be deep mahogany brown with some darker edges — not black, but not pale golden either. The outer leaves will be very dark, papery, almost charred-looking in spots. That’s correct. Those leaves are the best part.
Pierce the thickest sprout with a fork. It should go through with light pressure but not feel mushy. If you need to stab hard, give them 2 more minutes. If the fork sinks in with no resistance at all, you’ve gone a bit too far — still totally edible, just softer.
Let them rest on the pan for 2 minutes before serving. They crisp up a little more as they cool slightly, and you won’t burn your mouth. The USDA recommends cooking vegetables to an internal temperature that destroys pathogens, though for vegetables like brussels sprouts, visual doneness and fork-tenderness are the practical standard — Food Network’s roasted sprouts recipe uses similar visual cues.
Final Thoughts
The whole thing comes down to three things: 425°F, a preheated pan, and a single layer. Get those right and the toaster oven does the rest. Don’t overthink the timing — start checking at 18 minutes and trust your eyes over the clock. Every toaster oven runs slightly differently, and after one or two batches you’ll know exactly how yours behaves.
Brussels sprouts have a reputation they don’t deserve. Roasted properly, they’re nutty, slightly bitter in the best way, and genuinely satisfying. The toaster oven — small, fast, and heat-efficient — is actually the right tool for the job when you’re cooking for one or two people.
Frequently Asked Questions
What temperature should I roast brussels sprouts in a toaster oven?
425°F is the right temperature for toaster oven brussels sprouts. Lower temperatures — 375°F or 400°F — don’t generate enough surface heat to caramelize quickly, so the sprouts release moisture and steam instead of roast. If your toaster oven has convection, use it at 425°F and start checking a few minutes earlier than you would on standard bake.
How long do brussels sprouts take in a toaster oven?
At 425°F on standard Bake, halved brussels sprouts take 18–22 minutes, flipping once at the 12-minute mark. Convection cuts that to 17–19 minutes with a flip at 10 minutes. Frozen sprouts (partially thawed and halved) need 25–32 minutes depending on your model’s true output temperature.
Why are my roasted brussels sprouts soggy instead of crispy?
Soggy sprouts are almost always caused by one of three things: crowding the pan, not drying the sprouts before oiling, or skipping the pan preheat. Any moisture trapped between sprouts turns to steam rather than evaporating, which stews them instead of roasting. Use a single layer with space between each piece and preheat your pan in the oven before loading it.
Can I roast frozen brussels sprouts in a toaster oven?
Yes, but with adjustments. Let frozen sprouts thaw for about 20 minutes at room temperature — just enough to slice through them — then halve, dry thoroughly with paper towels, and roast at 425°F for 25–32 minutes. They won’t brown quite as deeply as fresh sprouts, but convection helps significantly. Don’t fully thaw before cooking or they’ll be waterlogged.
Do I need to flip brussels sprouts when roasting in a toaster oven?
Yes, one flip is recommended. Start cut side down on a preheated pan and flip at the 10–12 minute mark once the flat face is deep golden brown. The flip lets the rounded outer leaves crisp up and ensures the whole sprout cooks through evenly. Skipping the flip leaves the top side pale and underdeveloped.

Written by
Emma is a home cook who loves coaxing big flavor out of a toaster oven — from crispy roasted vegetables to easy weeknight dinners and sweet treats. She develops and tests Toastera's recipes for small-appliance kitchens.
Free: the Toaster Oven Cheat Sheet
Get the printable cheat sheet (temps, cook times & safety tips) plus new recipes. No spam, unsubscribe anytime.