A toaster won’t pop up bread for one of four reasons: crumb buildup jamming the carriage mechanism, a bent or corroded lever arm, a failed electromagnet that’s lost its holding power, or a broken spring that no longer has the tension to eject the toast. Most of these are fixable in under ten minutes without any special tools. The one exception is a dead electromagnet on a cheap unit — at that point, replacement usually makes more financial sense than repair.
Safety First: Always unplug your toaster and let it cool for at least 15 minutes before touching any internal components. Never poke metal objects (knives, forks, skewers) into a plugged-in toaster — even on a “off” setting, residual current can arc from the heating elements and cause a serious electric shock. If you see scorch marks, melted plastic, or smell burning insulation when you open the crumb tray, stop and replace the unit.
Quick Facts: Toaster Won’t Pop Up
- Crumb buildup is the #1 cause — roughly 60% of “stuck bread” complaints trace back to a dirty crumb tray blocking the carriage
- The electromagnet in most slot toasters operates between 12V and 24V DC and weakens when coated in grease or carbon residue
- A healthy toaster spring should push the carriage up with about 2–4 lbs of force; you can feel this when you push the lever down empty
- Toasters typically run their heating elements at 900–1,500 watts and reach internal temperatures between 300°F and 500°F — which is exactly why crumbs can smolder and jam the mechanism
- If your toaster is over 5 years old and the mechanism fails, replacement is almost always cheaper than professional repair
Why Bread Gets Stuck in the First Place
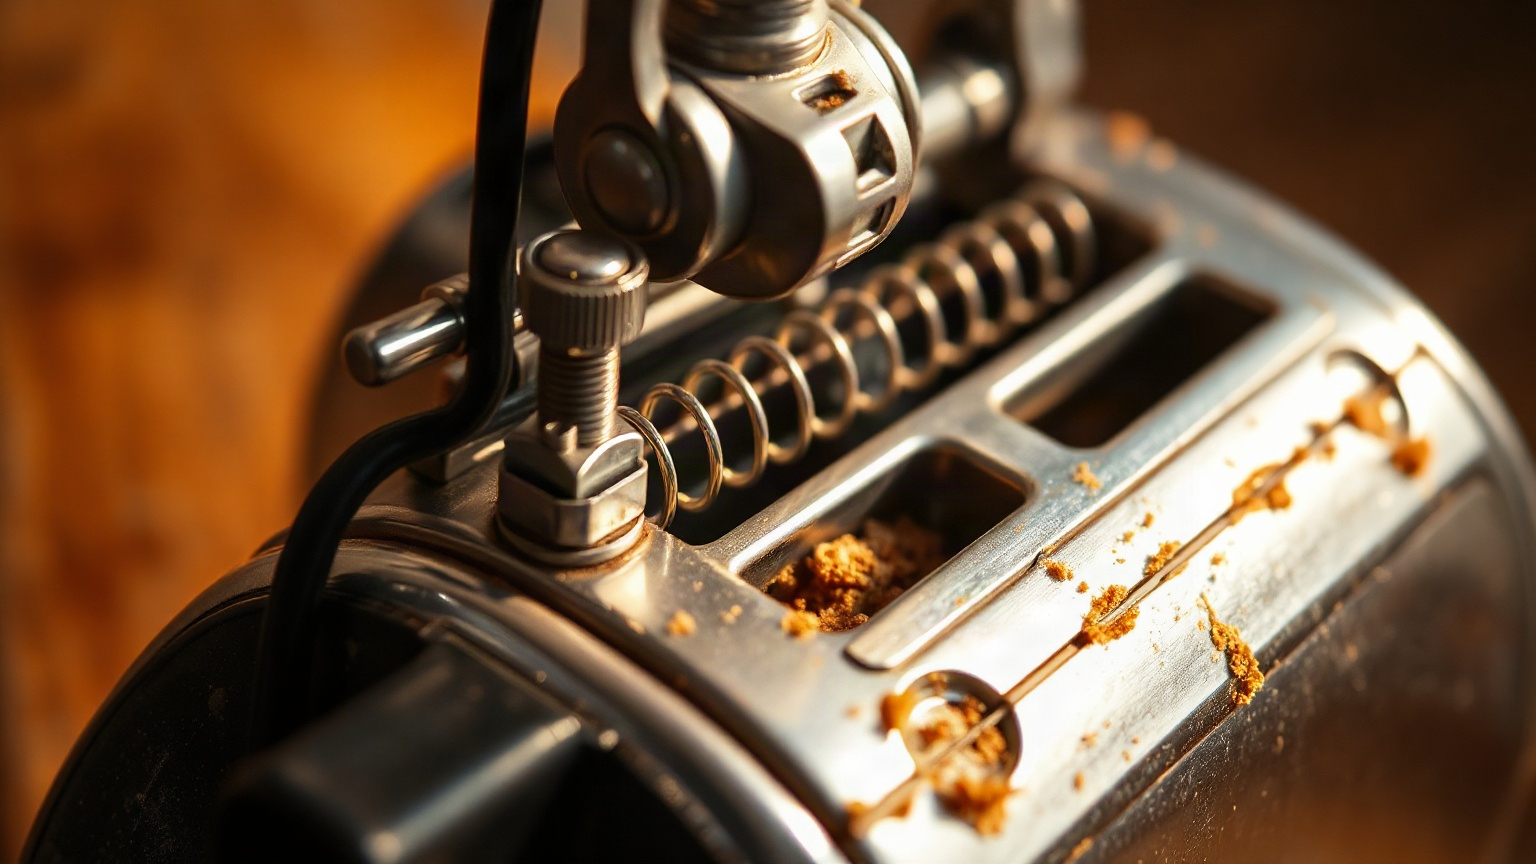
Let me back up a second, because understanding the mechanism makes every fix make sense. A slot toaster works on a surprisingly elegant little system: you push the lever down, which physically lowers the carriage (the wire cage holding your bread) and simultaneously latches it in place via an electromagnet. The heating elements fire up, the bimetallic thermostat strip bends as it heats, and when it reaches the right temperature — which you’ve set with that browning dial — it trips a release, the electromagnet lets go, and a coil spring shoves the carriage back up.
So “won’t pop up” can mean the spring isn’t pushing, the electromagnet isn’t releasing, the carriage is physically blocked, or the lever mechanism itself is bent. Four different failure points. Usually only one is actually broken.
The Crumb Jam (Most Common)
Here’s the one I see most often, including on my own Cuisinart last year. Crumbs fall through the bread slots and pile up in the crumb tray — fine, that’s what it’s there for. But if you haven’t emptied that tray in a while, crumbs also accumulate around the carriage rails and in the small gap where the carriage slides up and down. A dense enough buildup acts like a physical brake. The spring pushes, the crumbs resist. Toast stays down.
I once went about four months without cleaning my toaster (look, life gets busy), and when my sourdough finally stopped popping, I tipped the toaster upside down over the sink and about a quarter cup of compressed crumb debris fell out. A quarter cup. From a two-slot toaster. After cleaning and running a dry cycle, it worked perfectly.
The Weak or Dead Electromagnet
This one’s trickier to diagnose. If you push the lever down on an empty, unplugged toaster and it springs back up fine — but when it’s plugged in and toasting the bread stays stuck even after the cycle ends — the electromagnet is probably the culprit. When the thermostat trips, it cuts power to the magnet. If the magnet is fouled with grease or carbon deposits, it sometimes stays “sticky” for a few seconds. Or in worse cases, the magnet coil itself has partially failed and won’t release at all.
You can test this: plug the toaster in, push the lever down with nothing in the slots, and watch the timer cycle through. Does it pop up at the end of the cycle? No bread, no resistance from crumbs — just the mechanism. If it doesn’t pop up even empty, the electromagnet (or the thermostat wired to it) is the problem.
A Bent Lever or Carriage Rail
Toasters take abuse. They get knocked off counters, moved around, overstuffed with thick bagels. The lever arm is usually thin stamped steel, and it bends easier than you’d think. A bent lever can bind in the housing, which means even when the spring fires, the carriage can’t move freely. Bent carriage rails cause the same problem — friction wins over spring tension.
A Weak or Broken Ejection Spring
Springs fatigue over time, especially under heat cycles. A toaster that’s been used daily for five-plus years may simply have a spring that’s lost its tension. You’ll notice this because the lever feels unusually light going down — almost no resistance — and toast pops up sluggishly or not at all. A replacement spring costs almost nothing from a hardware store, but getting to it requires partial disassembly. For budget toasters, honestly, this is usually the point where buying a new one makes more sense.
How to Fix a Toaster That Won’t Pop Up: Step by Step
Work through these in order. Start simple.
Step 1: Clean It Thoroughly
Unplug the toaster. Remove the crumb tray. Hold the toaster upside down over a trash can or sink and shake it — gently at first, then with more intention. You want to dislodge anything sitting in the carriage rails. Use a small appliance cleaning brush (a dedicated pastry brush works, but a toaster brush is better because the bristles are stiff enough to reach into the rail grooves) to scrub around the carriage mechanism. Don’t use water inside the toaster. Ever. A dry brush and a can of compressed air is all you need.
Reinsert the crumb tray, plug it in, run an empty cycle. Nine times out of ten, this fixes it.
Step 2: Check and Straighten the Lever
With the toaster unplugged, push the lever down slowly and feel for binding. Does it catch? Move unevenly? Look at the lever from above — is it sitting straight in the slot or canted to one side? If it’s bent, you can sometimes coax it back with needle-nose pliers. Be gentle. These are thin metal parts and you want to unbend them, not snap them.
Also check that the small metal clips or tabs that guide the lever aren’t splayed outward. This is actually the most common physical fix mentioned in repair forums — bending those guide tabs back inward so the lever tracks straight.
Step 3: Address the Electromagnet
If cleaning didn’t help and the lever looks fine, you’re probably dealing with an electromagnet issue. On some toasters, you can access the magnet by removing the outer shell (usually two or four screws on the bottom or sides). The magnet itself looks like a small rectangular coil, and the release plate it grabs onto can be gently cleaned with a cotton swab and a tiny amount of isopropyl alcohol to remove carbon buildup.
If the coil itself is broken — you’ll see scorching or a physical break in the winding — the repair is probably not worth your time. Replacement coils exist, but sourcing the right one for a specific model takes effort that usually exceeds the cost of a new unit. For reference, a good replacement toaster starts around $25–$35. Factor that in before you spend two hours hunting parts.
Step 4: Test the Spring Tension
Push the lever down on an empty, unplugged toaster and hold it there for three seconds, then release. It should snap back decisively. Weak, slow, or partial return is a spring problem. On some toasters (particularly the classic “cage” design), the spring sits visible alongside the carriage and you can hook a small replacement spring in without major disassembly. On others, the spring is buried under the chassis and it’s not a beginner repair.
The Edge Case Nobody Mentions: Thick Bread and Slot Width
I haven’t seen this written up in any of the troubleshooting guides out there, and it’s genuinely something I ran into. If you’re regularly toasting very thick artisan bread, thick-cut Texas toast, or oversized bagels, the bread can swell during toasting as moisture evaporates and the bread puffs slightly. Not a lot, but enough. In a toaster with narrow slots (under 1.25 inches), this swelling creates friction against the heating element guards, and the spring can’t overcome that friction when it’s time to eject.
The fix for this isn’t a repair — it’s buying a toaster with wide slots (1.5 inches or more). Or just switching to thinner bread for that toaster. I know that sounds obvious, but I spent twenty minutes diagnosing my neighbor’s toaster before realizing he was cramming 1.5-inch-thick homemade sourdough into a toaster with 1.1-inch slots. The toaster was fine. The bread was too big.
When to Stop Repairing and Just Replace
This is worth being direct about. If your toaster is under warranty, return it or contact the manufacturer — don’t open it up, because you’ll void whatever coverage remains. If it’s past warranty and over four or five years old, the calculus changes. Toasters wear out. The heating elements degrade. The thermostat drifts and starts producing inconsistent browning. And if the carriage mechanism is the only thing wrong but the elements are also producing uneven heat, fixing the carriage just extends the life of a toaster that’s already deteriorating.
My personal threshold: if the fix takes under 15 minutes and costs nothing, do it. If it requires parts and more than 30 minutes of work, price a replacement first. Understanding how hot a toaster gets and how that affects internal components can also help you understand why older toasters fail — the repeated thermal cycling takes a real toll on springs, magnets, and bimetallic strips over time.
Toaster Failure Comparison: What’s Actually Wrong
| Problem | Symptoms | DIY Fix? | Difficulty | Worth Repairing? |
|---|---|---|---|---|
| Crumb jam | Bread stuck, lever feels stiff | Yes | Easy (5 min) | Always |
| Bent lever or rails | Lever binds, partial pop-up | Sometimes | Moderate (15 min) | Usually |
| Weak electromagnet | Bread stays down after cycle ends | Sometimes | Moderate-Hard | Depends on toaster age |
| Dead electromagnet coil | Never releases, no pop at all | Rarely | Hard | Usually no |
| Weak/broken spring | Sluggish or no ejection, light lever feel | Sometimes | Moderate | Only on newer units |
| Oversized bread swelling | Random sticking, works fine with thin bread | N/A (not a repair) | Easy (just buy wide-slot toaster) | N/A |
Maintenance That Prevents This From Happening Again
Empty the crumb tray every week. I know almost nobody does this, but it takes literally fifteen seconds and it’s the single best thing you can do for toaster longevity. Run an empty toast cycle (setting 2 or 3 — no need to go full dark) once a month if you use the toaster daily; this burns off any residue building up on the elements and around the carriage.
Keep the toaster away from steam sources — next to an electric kettle or directly below a range hood is a bad spot, because moisture accelerates corrosion on the carriage rails and the electromagnet contacts. And please don’t store anything on top of a toaster. The heat vents are on top on most models, and blocking them raises internal temperatures beyond what the thermostat expects. That accelerates wear on everything.
If you want to go deeper on caring for your appliance, this Serious Eats kitchen equipment guide covers general small appliance maintenance in useful detail. Good habits now mean you’re not fishing stuck bread out of your toaster every few months.
Final Thoughts
Most of the time, a toaster that won’t pop up just needs a good cleaning and maybe five minutes with a pair of needle-nose pliers. It’s genuinely not complicated. Start with the crumb tray and work your way up to the mechanism — and don’t skip the empty-cycle test, which tells you in about two minutes whether the problem is the bread or the toaster itself.
If you’ve cleaned it, checked the lever, and it still won’t fire reliably, the electromagnet is suspect. At that point, honestly weigh whether a replacement two-slot toaster just makes more sense. A decent one costs less than most restaurant breakfasts. And if you’re open to a bigger upgrade, switching to a toaster oven gives you a lot more flexibility — useful info on reheating food in a toaster oven if you go that route.
Frequently Asked Questions
Why does my toaster keep getting bread stuck inside even after I clean it?
If cleaning didn’t solve it, the problem has moved past crumbs — the most likely culprit is a bent carriage rail or a weakening electromagnet that isn’t releasing cleanly at the end of the toast cycle. Try the empty-cycle test: run the toaster with nothing in it and see if the mechanism pops up on its own. If it doesn’t, the electromagnet or thermostat connection needs attention.
Is it safe to use a toaster if the bread keeps getting stuck?
Don’t use it until you’ve diagnosed the issue. Bread that stays down after the heating cycle ends continues sitting next to active or cooling elements, which is a fire risk — particularly if the thermostat is also malfunctioning. Unplug the toaster and troubleshoot before using it again. A jammed mechanism on a functioning toaster is fixable; ignoring it can turn a minor repair into a kitchen fire.
How do I get bread unstuck from my toaster right now?
Unplug the toaster first — this is not optional. Let it cool for at least 10 minutes. Then use wooden tongs or a wooden chopstick (nothing metal) to gently work the bread free. Tipping the toaster on its side while you do this can help gravity assist. Never reach in with your fingers or metal utensils, even when unplugged, because the element wires are fragile and can be damaged.
Why won’t my toaster lever stay down?
The lever stays down because an electromagnet holds it — and that electromagnet only activates when the toaster is plugged in and receiving power. If the lever pops back up immediately when you push it down, either the toaster isn’t getting power (check the outlet), the electromagnetic latch is dead, or the thermostat circuit that powers the magnet has failed. A toaster that’s plugged in but won’t hold the lever at all usually needs professional repair or replacement.
How often should I clean my toaster to prevent bread from getting stuck?
Empty the crumb tray at least once a week if you use the toaster daily, and do a full shake-out cleaning (upside down over the sink, with a dry brush on the carriage rails) once a month. If you toast thick or seeded breads frequently, clean more often — seeds are particularly good at jamming carriage mechanisms because they wedge into tight spaces better than plain crumbs.

Written by
Emma founded Toastera to turn vague appliance advice into clear, researched, safety-first guidance on toasters and toaster ovens.
Free: the Toaster Oven Cheat Sheet
Get the printable cheat sheet (temps, cook times & safety tips) plus new recipes. No spam, unsubscribe anytime.