A toaster’s thermostat knows when to pop up your bread by sensing heat — not time. Inside most pop-up toasters, a bimetallic strip curves as it absorbs warmth from the heating elements, and once it bends far enough, it trips a latch that releases the spring mechanism. The darker your toast setting, the more the strip has to bend before that release happens, which means more heat exposure and browner bread.
Safety First: Toaster heating elements reach 1,100–1,200°F (593–649°C) internally and the outer slots can be hot enough to cause burns within seconds. Never insert metal objects into a toaster, never operate one near water, and always unplug it before cleaning or inspecting the crumb tray. If your toaster’s thermostat is misfiring or the latch is sticking, replace the appliance — don’t attempt internal repairs on a live unit.
Quick Facts: Toaster Thermostat Basics
- Most pop-up toasters use a bimetallic strip thermostat, not a simple timer
- The strip is made from two bonded metals with different expansion rates — usually brass and invar (a steel-nickel alloy)
- Heating elements inside a toaster reach roughly 1,100°F at the wire surface, while the bread itself toasts at 300–450°F
- Your “light/dark” dial physically adjusts how far the strip must bend before releasing the latch
- Some budget models do use a simple capacitor-based timer instead of a true thermostat — and those tend to produce inconsistent results
I want to talk about something I got completely wrong for years. I assumed the darkness dial on my toaster was just a timer knob — turn it further, more time, darker toast. Nope. At least, not in most cases. The actual mechanism is more interesting than that, and once you understand it, a few annoying toaster behaviors suddenly make total sense.
The Bimetallic Strip: The Real Brain of Your Toaster
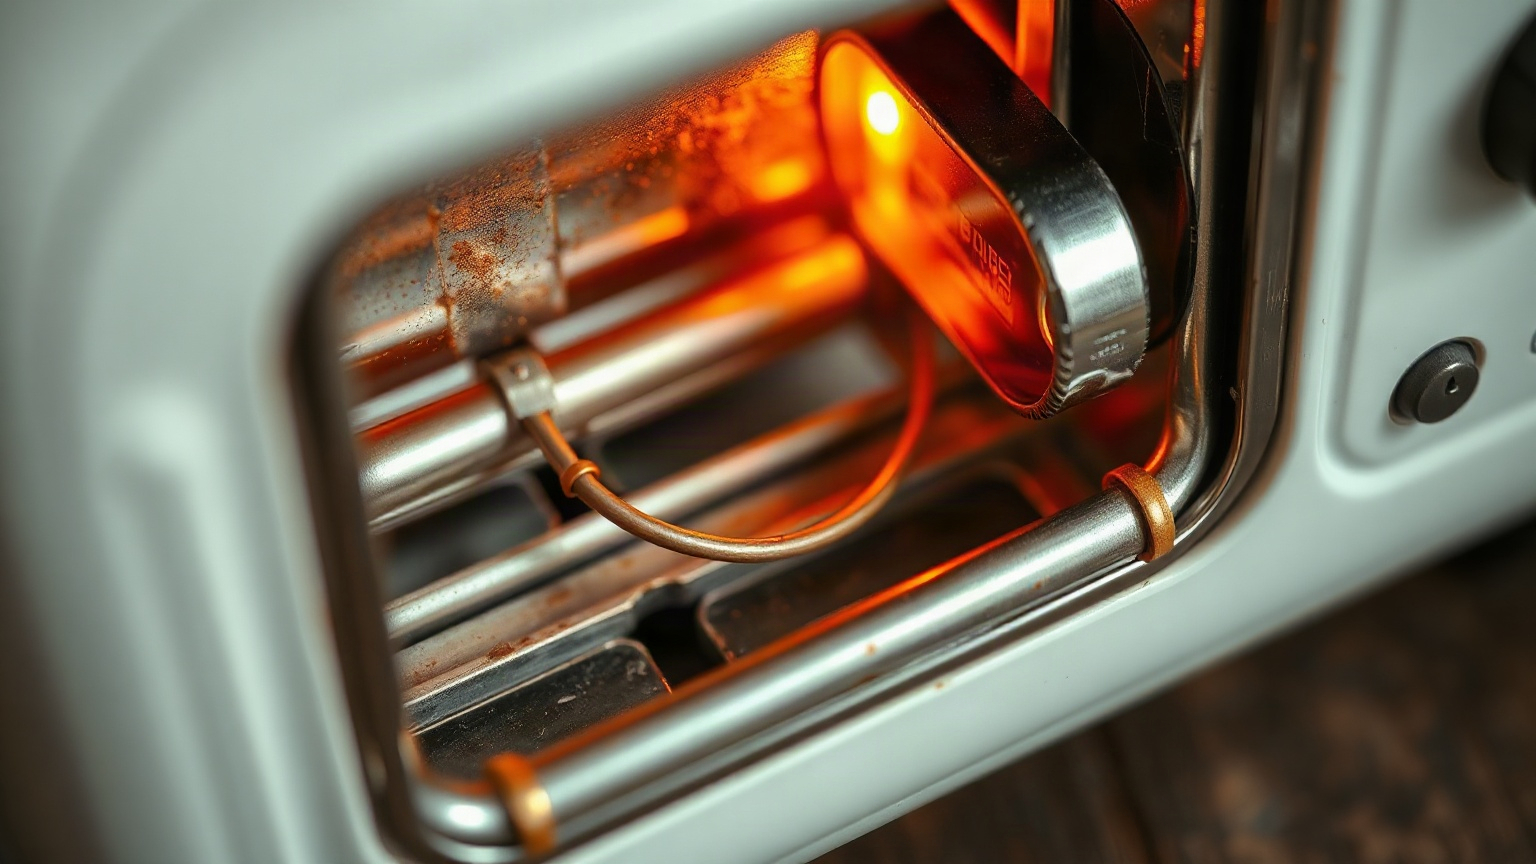
Here’s the part most people never hear about. A bimetallic strip is exactly what it sounds like: two thin sheets of different metals, bonded together along their length. The magic is that each metal expands at a different rate when heated. Brass expands faster than invar. So when the strip heats up, one side tries to grow longer than the other, and the whole thing curves — like a bimetallic banana.
That curve is the trigger. As toast cooks, heat radiates from the nichrome wire elements outward into the bread slot. Some of that heat also reaches the bimetallic strip, which is typically mounted near the bottom of the toaster, away from direct element contact but close enough to sense the ambient temperature inside the chassis. It bends slowly and steadily throughout the toasting cycle.
Once it curves enough to reach a physical contact point — a small latch or catch — it trips the mechanism. The spring that was holding your bread carriage down gets released. Up pops the toast. Simple, but genuinely elegant for a technology that dates back to the 1920s.
Why the Metals Matter
The specific metal pairing determines how sensitive the strip is. Brass and invar is a classic combination. Brass has a thermal expansion coefficient of roughly 19 × 10⁻⁶ per °C, while invar is around 1.2 × 10⁻⁶ per °C. That’s a huge difference — invar barely moves. So brass does all the curving while invar acts as the anchor. You get a reliable, repeatable bend at a predictable temperature. Which is exactly what you want from something that’s supposed to stop your breakfast from catching fire.
What the Darkness Dial Actually Controls
This tripped me up for a long time. The dial isn’t adjusting heat output or timing a relay. It’s physically moving a contact point relative to the bimetallic strip. Dial it toward “dark,” and you shift that contact further away from the strip’s resting position. The strip now has to bend more — meaning it has to absorb more heat — before it can make contact and trip the latch. More heat absorbed equals more time in the toaster equals darker toast.
Dial toward “light,” the contact moves closer. The strip barely has to move before it releases. Your toast barely gets color. Which is fine if you’re just warming bread, but a little sad if you wanted actual toast.
I always run my old Dualit on setting 3 out of 6 for standard sandwich bread. Setting 4 for anything thicker, like sourdough. Setting 5 makes me nervous — that’s where I’ve had a few close calls with particularly thin slices.
The Electromagnet Variant (Slightly Different Design)
Some toasters — especially slightly older or more mechanically elaborate models — use a small electromagnet to hold the bread carriage down rather than a mechanical latch directly triggered by the strip. In this design, the bimetallic strip (or sometimes a separate timer circuit) cuts power to the electromagnet once the target temperature is reached. Without current, the magnet releases. The spring does the rest.
This setup is a little more robust against wear since there’s less direct physical contact between the strip and the release mechanism. But it adds complexity. And complexity in a $30 appliance is a liability. Both designs are in use today; you likely can’t tell which yours uses without opening it up, which I’d strongly advise against while it’s plugged in.
Toaster Heat vs. Timer: Which Method Actually Works Better?
Budget toasters sometimes skip the bimetallic strip entirely and use a capacitor-based timing circuit. The dial sets how long the capacitor charges before triggering a relay that cuts power and releases the carriage. Time-based, not temperature-based.
The problem: time doesn’t account for starting conditions. Put cold bread into a cold toaster, and you’ll get different results than putting the same bread into a toaster that just finished a cycle and is still warm inside. The thermostat-based approach compensates for this automatically — the strip’s starting position is slightly different depending on ambient temperature, so it trips sooner if the toaster is already warm. This is why a good thermostat toaster tends to produce consistent results on back-to-back cycles, while a timer toaster often burns the second batch.
I noticed this exact issue with a cheap 2-slice toaster I had in a vacation rental. First round: fine. Second round: noticeably darker. Every time. Classic capacitor timer behavior.
| Feature | Bimetallic Thermostat | Capacitor Timer |
|---|---|---|
| Controls via | Heat detected inside toaster | Fixed elapsed time |
| Adjusts for warm toaster? | Yes, automatically | No |
| Consistency back-to-back | High | Lower |
| Found in | Mid-range to premium toasters | Budget models |
| Complexity | Mechanical, minimal electronics | Simple circuit |
| Repairability | Very low (don’t try) | Very low (don’t try) |
For more context on how hot things get inside the chassis during all this, check out how hot a toaster gets — I cover the actual temperature ranges at different points inside the machine.
Edge Cases: When the Thermostat Gets It Wrong
This is the part none of the technical explainers seem to talk about. The bimetallic strip works beautifully under normal conditions. But there are a handful of situations where it misjudges, and knowing them can save you some very burnt breakfast.
Frozen Bread
Straight-from-the-freezer bread absorbs a lot of heat before it starts toasting — thawing takes energy. The strip is sensing ambient temperature inside the toaster, not the bread surface temperature directly. So it can heat up and trip the latch before the bread has actually browned properly. Many modern toasters have a dedicated “frozen” setting that adjusts the contact point to let the cycle run longer. If yours doesn’t, bump up one shade darker than usual. I always do setting 4 instead of 3 for frozen sourdough slices.
Very Thin or Very Dense Bread
Thin white sandwich bread toasts fast and can brown before the strip trips at your usual setting. Dense rye or whole grain needs more time. The thermostat is responding to the heat environment inside the toaster, but different bread types radiate or absorb that heat differently. It’s not a perfect system. You’ll probably need to experiment by half-steps on the dial when switching bread types.
The “Reset” Problem After the First Cycle
Here’s an edge case from a 1988 appliance service bulletin that I found buried in old repair literature: after the toaster pops, the bimetallic strip needs a brief cool-down period to return to its neutral position. If you immediately push the carriage down again, the strip is still partially bent from the last cycle, which means it’s already partway to the release point. It’ll trip faster than expected and undercook your second slice. Wait 30–60 seconds between back-to-back cycles. Annoying? Yes. But it prevents pale second toast.
Crumb Buildup
Crumb Buildup
A packed crumb tray isn’t just a fire hazard — it can subtly affect the thermal environment inside the toaster, making the strip behave inconsistently. Clean the tray regularly. And I mean actually slide it out and shake it out, not just tilt the toaster sideways over the sink (which spreads crumbs into the element area anyway).
If your toaster is consistently undercooking or overcooking even after adjusting the dial, and it’s more than a couple years old, the bimetallic strip may have fatigued slightly. Metal that flexes thousands of times can lose some of its calibration. At that point, a quality replacement toaster with a bimetallic thermostat is genuinely the better call versus living with unpredictable results.
Does Any of This Change How You Should Use Your Toaster?
Honestly, yes — in small ways. Knowing the thermostat responds to heat, not time, means you should:
- Let the toaster cool between cycles if you want consistent results batch after batch
- Use the frozen setting (or go one shade darker) for straight-from-freezer bread
- Expect to adjust the dial when switching between thin sandwich bread and thick artisan slices
- Keep the crumb tray empty — it matters more than you think
If you’re interested in how heat management differs in larger appliances, the logic is similar but more layered in reheating food in a toaster oven, where you’ve got a thermostat controlling a cycling element rather than a single pop-up event. And if you’re shopping for a compact option, my picks for the best mini toaster ovens include notes on how well each handles temperature consistency.
For a deeper look at heating element behavior and appliance thermal dynamics, the Serious Eats equipment section has some genuinely useful breakdowns of how kitchen appliance heat affects food outcomes — worth a read if you’re into this stuff.
The Bottom Line
The thermostat in your toaster is a beautifully low-tech solution to a real problem: how do you stop cooking at exactly the right moment without a person watching? A strip of two metals, bonded together, curving under heat until it physically trips a latch. That’s it. No microchip required.
It’s not perfect. Frozen bread, back-to-back cycles, and crumb buildup can all throw it off. But for a device with no screen and one moving part, it does a remarkable job. Understanding it won’t make your toast taste better — but it will stop you from blaming the toaster for things that are actually just physics.
If you want to upgrade to something more precise, Cuisinart’s stainless 2-slice toasters consistently use proper bimetallic thermostats and have been reliable in my own kitchen for years. And if you want the best of both worlds — a toaster oven with actual digital temperature control — check out what I’ve tested in the mini toaster oven roundup.
Frequently Asked Questions
How hot does a toaster get inside?
The nichrome wire heating elements in a typical pop-up toaster reach surface temperatures between 1,100°F and 1,200°F (593–649°C). The air temperature inside the bread slot is much lower — roughly 300–450°F depending on the setting — which is what actually toasts the bread surface. The external slot opening is hot enough to cause a burn on contact, so keep fingers and metal utensils well clear.
Why does my toaster pop up too early?
Early popping usually means the bimetallic strip is tripping the latch before enough heat has transferred to the bread — often because the toaster is already warm from a previous cycle, or the strip itself has fatigued over time and bends more easily than it used to. Try letting it cool for 60 seconds between cycles. If that doesn’t help and the toaster is more than two or three years old, the strip may need replacement — or more practically, the toaster does.
Is it safe to leave a toaster plugged in?
Most modern toasters draw zero power when idle and plugged in, so energy use isn’t the concern. The real risk is accidental activation — a child pressing the lever, crumbs igniting if the tray is full, or a mechanical fault in older units. Unplugging when not in use is the safer habit, especially if the toaster is more than five years old or showing any signs of inconsistent behavior.
Does the toaster darkness setting control time or temperature?
In thermostat-based toasters, the darkness dial controls how far the bimetallic strip must bend before releasing the latch — which is effectively a temperature threshold, not a fixed time. In cheaper timer-based models, the dial does set a time duration via a capacitor circuit. Thermostat models produce more consistent results because they compensate for the toaster’s starting temperature; timer models don’t.
Why does my second batch of toast come out darker than the first?
This is almost certainly a timer-based toaster issue. If your toaster uses a capacitor timer rather than a bimetallic thermostat, it runs for a fixed time regardless of how warm the appliance already is. A pre-heated toaster toasts faster, so the second batch gets more color with the same time setting. The fix is either to reduce the setting slightly for subsequent batches or switch to a thermostat-based model that self-adjusts.

Written by
Emma founded Toastera to turn vague appliance advice into clear, researched, safety-first guidance on toasters and toaster ovens.
Free: the Toaster Oven Cheat Sheet
Get the printable cheat sheet (temps, cook times & safety tips) plus new recipes. No spam, unsubscribe anytime.