Your toaster lever won’t stay down because either the latch mechanism is dirty or corroded, the electromagnet that holds it down has failed (or isn’t getting enough current), or a small spring or catch inside the carriage assembly is broken or dislodged. Those are the three root causes behind about 95% of cases. The fix ranges from a five-minute crumb-tray cleaning to replacing the unit entirely, depending on which one you’re dealing with.
Safety First: Before you open, clean, or inspect any part of your toaster, unplug it from the wall — not just turn it off, actually unplug it. Toasters operate at 120V and the heating elements can stay dangerously hot for several minutes after use. Never insert metal tools or your fingers into the slots while the unit is plugged in. If you suspect internal wiring damage (burning smell, visible scorching, sparking), stop using the toaster immediately and do not attempt to repair it yourself.
Quick Facts: Toaster Lever Problems at a Glance
- The most common cause is crumb buildup around the latch or carriage mechanism — costs $0 to fix and takes under 10 minutes.
- Toasters use a small electromagnet (powered by the heating circuit) to hold the lever down; if your outlet voltage is low or the thermostat is faulty, the magnet never gets enough current.
- A broken or dislodged latch spring is the second most common physical failure — sometimes fixable, often a sign it’s time to replace the toaster.
- Budget toasters (under $25) almost always have plastic latches that wear out within 2–3 years of daily use.
- If your toaster is more than 7–8 years old and the lever is popping up, replacement is almost always the smarter call than repair.
How the Lever Mechanism Actually Works
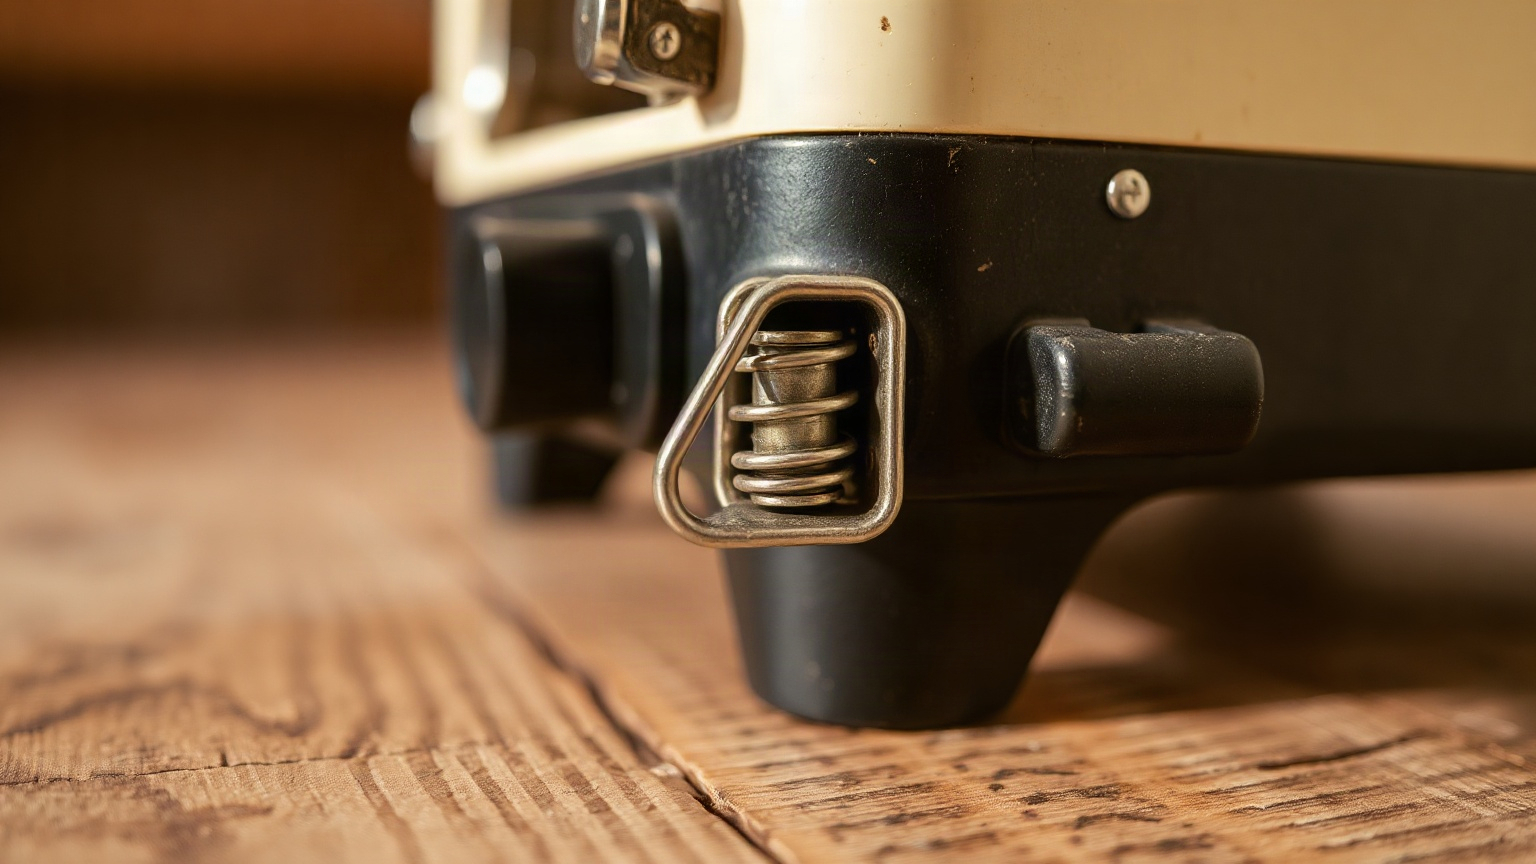
Most people assume the lever is held down by a simple physical latch, like a door latch. It’s not. Well — not exactly. A standard pop-up toaster uses a small electromagnet to hold the carriage (and your bread) in the down position. When you push the lever down, it closes a circuit that energizes the heating elements. That same circuit powers the electromagnet. The electromagnet holds a small metal plate attached to the carriage.
Here’s the clever part: the thermostat (or timer, depending on the model) controls when the circuit breaks. When your bread is done, the thermostat trips, cuts the circuit, the electromagnet loses power, and — pop — the spring launches your toast upward. It’s an elegant little system, actually. Which makes it annoying when one small thing goes wrong and the whole sequence falls apart.
Some cheaper toasters skip the electromagnet entirely and use a bimetal strip or a simple mechanical latch. Those have their own failure modes, mostly involving the latch bending or the strip losing its tension over time. Worth knowing which type you have before you start troubleshooting.
The Most Likely Reasons Your Lever Keeps Popping Back Up
1. Crumb Buildup Blocking the Latch
This is the one I’d bet on first, every time. Crumbs are sneaky. They don’t just sit in the tray — they migrate upward into the carriage mechanism, pack around the latch catch, and physically prevent the lever from seating properly. The lever touches down, feels like it caught, then springs back the second you let go.
I had this happen with a Cuisinart CPT-122 I’ve had for about four years. The lever was bouncing back almost instantly, and I was convinced the electromagnet had died. Pulled the crumb tray, shook it out over the sink, then held the toaster upside down and gave it 10–12 firm taps on the counter. The amount of debris that fell out was genuinely embarrassing. Lever worked perfectly after that. Took maybe six minutes total.
Start here. Always start here.
2. Faulty or Weak Electromagnet
If cleaning doesn’t fix it, the electromagnet is the next suspect. A few things can cause this. The heating element circuit might have a partial break, meaning the magnet isn’t getting enough current to hold. The thermostat might be misfiring and cutting the circuit too early — before the heating elements even warm up. Or the magnet itself has weakened or corroded.
A quick test: plug the toaster in, push the lever down very slowly and hold it with light finger pressure for 3–4 seconds. If it holds while you’re touching it but pops the instant you let go, the magnet is almost certainly too weak to latch on its own. If it pops even while you’re pressing down, you’ve got a different problem — likely the latch or spring.
Also worth checking: which outlet you’re using. A heavily loaded circuit or an older outlet with low voltage can leave the electromagnet underpowered. Try a different outlet before assuming the toaster is broken. Sounds obvious. Genuinely works about 15% of the time in my experience.
3. Broken or Stretched Latch Spring
The latch spring (sometimes called the catch spring) is a small metal component that keeps the lever engaged with the electromagnet plate. If it’s stretched, bent, or snapped, the lever has nothing to seat against. This is more common in toasters that have been dropped, or in budget models where the spring steel quality is… let’s say optimistic.
You can sometimes spot a broken spring by removing the crumb tray and shining a flashlight inside from below. A missing or obviously bent spring is visible if you know what you’re looking for. Replacement springs are available, but honestly — finding the right part for a specific budget toaster model is a nightmare. iFixit has some useful teardown guides for common models, and it’s worth checking there first.
4. Worn or Stripped Lever Notch
This is the edge case most repair guides skip. The lever itself has a small notch or groove that interfaces with the latch. On plastic-bodied levers (which are most toasters under $40), that notch wears smooth over time. When it’s worn enough, there’s nothing for the catch to grab. The lever slides right back up. No amount of cleaning or electromagnet work will fix this, because the mechanical engagement point is gone.
If you look at the lever and the notch looks rounded or almost nonexistent, that’s your answer. Replacement lever assemblies exist for some models (Hamilton Beach, Black+Decker, some Cuisinart units), but at that point you’re looking at $8–15 in parts plus the frustration of finding the right one. For a $30 toaster, just replace it.
5. Thermostat or Bimetal Strip Failure
Less common, but worth mentioning. The thermostat controls the browning level by sensing heat and tripping at the right moment. If it’s miscalibrated or failed, it can trip almost immediately — cutting power to the electromagnet within seconds of you pushing the lever down. The lever pops back up and your bread is completely raw.
The tell here is timing. If the lever holds for 5–10 seconds and then releases with a click (even though nothing is toasted), the thermostat is likely cutting too early. Some thermostats have a small adjustment screw accessible from outside the toaster — usually visible near the browning dial — but adjusting it without a meter is trial and error. This is also the kind of repair where the labor is genuinely worth more than the toaster.
Step-by-Step: How to Fix It (In Order of Effort)
Work through these in order. Stop when it’s fixed.
- Step 1 — Unplug and clean: Remove the crumb tray, empty it, then hold the toaster upside down over a trash can and tap firmly 10–15 times. Shake gently side to side. Use a soft-bristled brush (a clean pastry brush works great) to loosen debris from inside the slots. Plug back in and test.
- Step 2 — Try a different outlet: Plug into an outlet on a different circuit, ideally one that isn’t shared with a microwave, fridge, or other high-draw appliance. Test again.
- Step 3 — Inspect the lever and latch visually: Unplug. Remove the crumb tray. Use a flashlight and look for obvious debris blocking the latch, or a visibly broken/missing spring. If you see debris, use a can of compressed air to clear it.
- Step 4 — Check the lever notch: Look at the side of the lever where it interfaces with the body. If the notch is worn smooth, that’s the failure point.
- Step 5 — Decide: repair or replace: If the toaster is under 3 years old and you can find a replacement part, it may be worth fixing. Over 5 years old, or a budget model under $30? Time for a new one. Check our list of the best mini toaster ovens if you’re thinking about upgrading to something with more functionality.
When to Repair vs. Replace: A Practical Guide
I know people get attached to appliances. I kept a dying toaster running for two extra years mostly out of stubbornness. But there’s a real calculus here.
| Situation | Recommended Action | Estimated Cost |
|---|---|---|
| Crumb buildup blocking latch | Clean it — takes 10 minutes | $0 |
| Outlet/voltage issue | Try different outlet or circuit | $0 |
| Latch spring broken, toaster under 3 years old | Source replacement part (iFixit, manufacturer) | $5–$20 |
| Worn lever notch, mid-range toaster | Contact manufacturer; may cover under warranty | $0–$25 |
| Electromagnet failed, toaster over 5 years old | Replace the toaster | $25–$80 for new unit |
| Thermostat failure, budget toaster | Replace the toaster | $25–$50 for new unit |
If you do decide to replace it, think about what’s actually annoying you. A traditional two-slot pop-up toaster is fine for bread and bagels. But if you find yourself wanting to toast thicker items, reheat leftovers, or actually cook things — a compact toaster oven is a significantly more useful appliance. Worth the counter space, in my opinion. You can read more about reheating food in a toaster oven to get a sense of what you’d be gaining.
If you do want a straight replacement pop-up toaster, look for one with a stainless steel body and wide slots — the build quality is meaningfully better than all-plastic models, and the latch mechanisms tend to hold up much longer. Or if you’re open to a step up, a compact toaster oven with convection will run circles around any pop-up for versatility.
For reference on just how much heat these things are dealing with internally, how hot a toaster gets is worth a look — it gives some context for why components degrade the way they do over time.
Preventing It From Happening Again
Empty the crumb tray every week. Not every month — every week, especially if you use the toaster daily. Crumb accumulation is slow until it isn’t, and by the time it’s causing lever problems, there’s already compacted debris in places the tray doesn’t reach.
Don’t force the lever down if it’s resisting. That pressure goes directly onto the latch and spring components. If it’s not catching, figure out why first. Jamming it harder just accelerates the wear.
And don’t store things on top of the toaster. Sounds unrelated. It’s not — weight or pressure on the top of the housing can subtly warp the chassis and misalign the internal components, especially on cheaper plastic-bodied units. I learned this the hard way when a small plant pot lived on my toaster for about three months and the lever got progressively harder to engage.
For a more thorough cleaning process, the Serious Eats guide to cleaning a toaster is genuinely good — more detailed than most appliance manuals and actually practical.
The Bottom Line
A toaster lever that won’t stay down is almost always caused by one of three things: crumb buildup jamming the latch, a weak or failed electromagnet, or a broken latch spring. Start with the free fix — thorough cleaning — and you’ll solve it most of the time. If that doesn’t do it, work through the other causes systematically before assuming you need a new toaster.
That said. If your toaster is old, cheap, or both, don’t pour time and money into it. A decent replacement toaster with a solid metal mechanism and proper crumb management will outlast three of the plastic budget models. Sometimes the best repair is just starting fresh with something better-built. Check out some long-slot stainless toasters with high-lift levers if you want a model where the lever mechanism is genuinely robust — high-lift designs, in particular, tend to have more durable latch assemblies than standard models.
Frequently Asked Questions
Why does my toaster lever pop back up immediately when I push it down?
Immediate popping (within a second or two) usually means the electromagnet isn’t engaging at all, either because crumbs are blocking the latch from seating or because the electromagnet circuit isn’t completing. Unplug the toaster, clean it thoroughly by emptying the crumb tray and tapping it upside down, then test again. If it still pops immediately, the issue is likely the electromagnet or a broken latch spring rather than debris.
Can I fix a toaster lever myself, or do I need a professional?
Cleaning and basic inspection are genuinely DIY-friendly — no tools needed and no disassembly required. Beyond that, internal repairs on a toaster are fiddly and the parts can be hard to source, and most repair shops won’t service small appliances because the labor cost exceeds the replacement cost. If cleaning doesn’t fix it, replacement is almost always the more sensible path unless you have a premium toaster worth repairing.
Is it safe to use a toaster if the lever won’t stay down?
If the lever pops back up before the heating elements fully engage, the toaster just isn’t toasting — which is annoying but not dangerous. However, if you’re manually holding the lever down to force it to stay, stop doing that immediately. Holding the lever defeats the safety release mechanism and could cause overheating or a fire. A toaster that won’t stay down should be fixed or replaced, not forced.
How long should a toaster last before the lever mechanism fails?
A well-made toaster with a metal latch mechanism should last 6–10 years with normal use and regular cleaning. Budget plastic-latch models often show lever problems within 2–4 years of daily use. The biggest variable is maintenance — a toaster that’s cleaned weekly will outlast a neglected one by years, regardless of build quality.
Why does my toaster work fine sometimes but other times the lever pops right back up?
Intermittent popping is a classic sign of partial crumb obstruction or a weakening electromagnet — both of which get worse gradually. Temperature and humidity can also affect it; a bimetal thermostat may behave differently in a cold kitchen versus a warm one. Thorough cleaning usually resolves it if it’s debris-related, but if the problem keeps returning, the electromagnet or thermostat is likely on its way out.

Written by
Emma founded Toastera to turn vague appliance advice into clear, researched, safety-first guidance on toasters and toaster ovens.
Free: the Toaster Oven Cheat Sheet
Get the printable cheat sheet (temps, cook times & safety tips) plus new recipes. No spam, unsubscribe anytime.