The rotisserie setting on an air fryer toaster oven spins food on a spit while circulating hot air at high speed — typically between 375°F and 400°F — to brown the exterior evenly without you having to flip or baste anything. It works because the rotation keeps fat basting the meat continuously as it drips and re-contacts the surface. The result is genuinely crispy skin and juicy interior, and once you’ve used it a few times, you’ll wonder why you ever bothered with static roasting.
Safety First: Rotisserie cooking involves a spinning metal spit at high heat — always confirm the spit is locked into both mounting brackets before you start, and never reach inside a running oven to adjust food. Use oven mitts rated for high heat when removing the spit, as the rod itself reaches the full oven temperature and will cause serious burns on contact. Keep the drip tray in place throughout cooking to prevent grease from hitting the heating element, which is a real fire risk.
Quick Facts: Air Fryer Toaster Oven Rotisserie
- Most rotisserie-capable air fryer toaster ovens run the spit at a fixed rotation speed; you control temperature (typically 350–400°F) and time, not the spin rate.
- A 3–4 lb whole chicken takes roughly 60–75 minutes at 375°F on the rotisserie setting; always verify with a meat thermometer (165°F internal at the thickest thigh meat).
- The drip tray is not optional — grease collects fast, and skipping it is how you get smoke and potentially a grease fire.
- Trussing the bird tightly before mounting is the single biggest factor between a perfect result and a floppy, unevenly cooked mess.
- Most countertop rotisserie spits have a weight limit around 4–5 lbs; check your manual before attempting a larger roast.
What the Rotisserie Setting Actually Does (and Doesn’t Do)
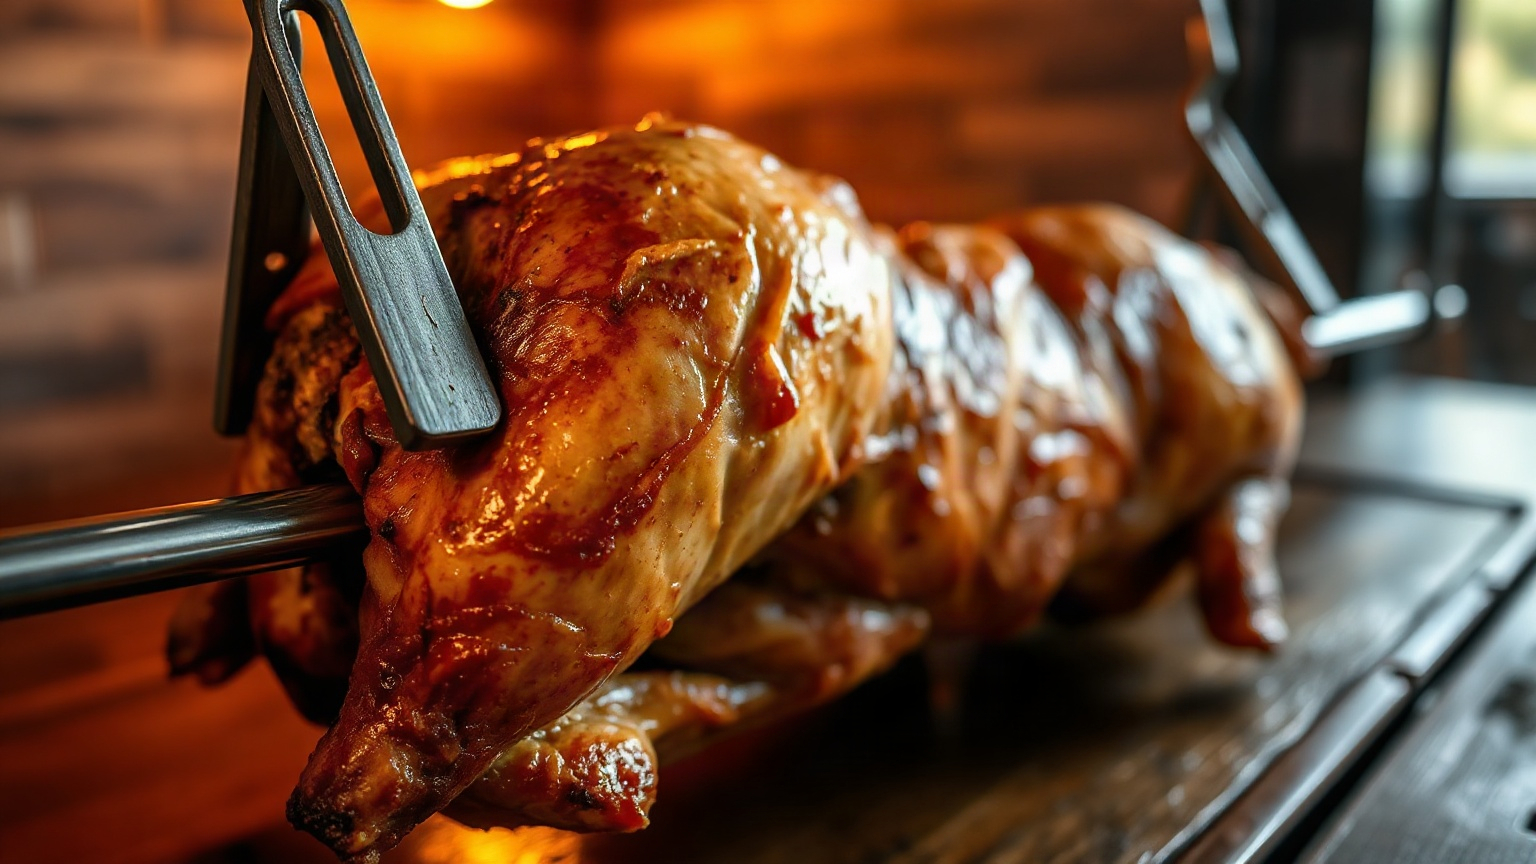
It’s not magic. The rotisserie function is really just your oven’s convection fan running at high output while the spit motor turns. Some machines let you use it as a standalone function; others require you to manually set the temperature and then select “Rotisserie” to activate the spit motor alongside the existing heat mode. Worth reading your specific manual on this, because I’ve seen people use the air fry mode with the spit in place and wonder why the rotation wasn’t starting — different models, different logic.
The rotation does two things simultaneously. First, it moves the food through the hot air column repeatedly, so no single side sits against the heat source for long. Second, as the fat renders and drips, the spin action means it briefly re-coats the meat surface on the next revolution. That’s the self-basting mechanic people talk about, and it’s genuinely effective. Skin-on chicken thighs come out in a way that static air frying just doesn’t match.
What it doesn’t do: it won’t save poorly prepped food. If you don’t truss your chicken, the wings and legs will flap around, cook unevenly, and potentially jam against the oven walls. And it won’t compensate for under-seasoning — the crust you get is real, so if the seasoning is thin, you’ll taste it.
Setting Up the Rotisserie: Step by Step
Assembling the Spit
Most air fryer toaster ovens come with a rotisserie rod, two forks (the pronged pieces that grip the food), and sometimes a rotisserie basket for smaller items like shrimp or vegetables. The forks slide onto the rod and tighten with thumbscrews. Don’t overtighten to the point where you strip the screws, but make sure the food has zero play — if it wobbles independently of the rod, it’ll cook unevenly and might not spin cleanly.
Thread the rod through the food before you mount it. Push both forks firmly into the meat from each end so they’re buried at least an inch in. Then slide the rod into the mounting brackets inside the oven. One side usually has a square socket and the other has a rounded cradle — the square end connects to the motor, so get that side right.
Trussing (Yes, It Matters)
Trussing is tying the bird into a compact shape with butcher’s twine so nothing hangs loose. Tuck the wings against the body, tie the legs together, and loop twine around the whole bird a couple times. It takes maybe three minutes. The first time I skipped this step I had a wing get caught against the heating element rack, which stopped the rotation mid-cook and dried out one half of the chicken completely. Lesson learned.
If you’re cooking something smaller — a pork tenderloin, say — tie it into an even cylinder so it’s the same diameter from end to end. Otherwise the thin ends overcook while the center is still underdone.
Positioning the Drip Tray
The drip tray goes on the lowest rack position, directly under the spit. Add about a quarter cup of water to it — this reduces smoke by preventing the first few drips from hitting a dry, scorching-hot surface and burning instantly. Some people add herbs or a splash of wine to the drip tray for aromatics, which is optional but genuinely nice with chicken.
Temperature and Time: Actual Numbers to Work From
These are ranges I’ve used repeatedly and that reflect what most air fryer toaster oven manufacturers recommend. The thinner the food, the lower end of the range; the denser, the higher. Always confirm doneness with a thermometer — time is a guideline, temperature is the answer. USDA safe internal temperatures are non-negotiable here.
| Food | Temperature | Approximate Time | Target Internal Temp |
|---|---|---|---|
| Whole chicken (3–4 lbs) | 375°F | 60–75 min | 165°F at thigh |
| Whole chicken (4–5 lbs) | 375°F | 75–90 min | 165°F at thigh |
| Pork loin roast (2–3 lbs) | 375°F | 45–60 min | 145°F |
| Leg of lamb (boneless, 3 lbs) | 400°F | 50–65 min | 135–145°F |
| Rotisserie basket vegetables | 400°F | 18–25 min | N/A — visual cue |
| Rotisserie basket shrimp | 390°F | 8–12 min | N/A — visual cue |
One thing I want to flag: air fryer toaster ovens run hot relative to their displayed temperature in a way that standard ovens don’t. This is partly the fan intensity, partly smaller cavity. I’ve found dialing back the target temp by 10–15°F from whatever recipe you’re adapting from a standard oven is a good habit. For rotisserie chicken, I personally use 370°F and get beautiful results — the extra few minutes don’t bother me and the skin doesn’t rush to dark before the inside is done.
Getting the Best Results: Technique Details That Actually Matter
Seasoning and Resting Before Cooking
Dry brine if you can. Rub salt all over the chicken the night before (or at minimum an hour before), leave it uncovered in the fridge, and pat the skin dry right before it goes on the spit. Wet skin steams; dry skin crisps. This one step is responsible for about 70% of the difference between good rotisserie skin and excellent rotisserie skin.
Add any oil or butter rub after the dry brine step, right before mounting. Herb butter under the skin works well on the rotisserie because the fat stays put during the spin rather than dripping off immediately — just loosen the skin at the breast and push compound butter in there before you truss.
Checking and Finishing
Don’t open the oven more than once during cooking. Each time you do, you drop the temperature and disrupt the airflow pattern that’s doing the browning work. I check at about the 50-minute mark for a 3.5 lb bird, check the thigh temp, and make a call from there. If the skin is browning faster than I want before the inside is done, I’ll tent a small piece of foil over the breast — but honestly, with a properly dry-brined bird at the right temp, this is rarely necessary.
Rest the bird for at least 10 minutes after you pull it. The spit will be scorching — set it on a carving stand or a rimmed baking sheet, and let the juices redistribute. Cutting into it immediately is the fastest way to lose all the moisture you just spent 70 minutes building.
Using the Rotisserie Basket
Not every air fryer toaster oven includes one, but if yours came with a rotisserie basket (sometimes called a tumble basket), use it for small-cut vegetables, cubed meat, or seafood. The basket mounts on the spit the same way and tumbles the food as it rotates. It’s genuinely fun for things like Brussels sprouts or cubed sweet potato — they get contact on all sides without you doing anything. Just don’t overfill it; you want some space inside so the food actually tumbles rather than just packing together.
For more ideas on what to cook beyond rotisserie, the reheating food in a toaster oven guide is worth a look if you end up with leftovers. And if you’re shopping for a machine that actually has a rotisserie function, check the best mini toaster ovens roundup for size guidance.
The Edge Case Most Guides Skip: What to Do When the Rotation Stops
It happens. The spit stalls mid-cook — usually because the food shifted and is now pressing against the oven wall or the rack. Here’s what not to do: don’t reach in and grab it. Turn the oven off first. Wait thirty seconds. Then open the door and use tongs or oven mitts to push the food back toward center, check that the rod is still seated in both brackets, and restart.
If the motor keeps stalling, your bird might be too heavy for the motor. Most countertop units max out around 4–5 lbs. A 6 lb bird will work the motor hard, stall repeatedly, and cook unevenly even if it technically fits in the cavity. For anything over 5 lbs, static roasting in the oven on a wire rack will give you better results than fighting the rotisserie. The temperature dynamics inside toaster ovens mean a large roast will still cook faster than a conventional oven even without the spin.
Also — and this is something I’ve never seen in another guide — if you’re cooking something with a marinade that has significant sugar in it (honey, teriyaki, barbecue-style), watch the last 15 minutes closely. The sugar can go from golden to burnt fast under constant rotation with high airflow. I’ll sometimes drop the temperature to 350°F for the final stretch if the glaze looks like it’s threatening to tip over. Serious Eats has a good breakdown of why high-sugar glazes behave unpredictably at high heat if you want the actual food science behind it.
Cleaning Up After Rotisserie Cooking
The drip tray will have rendered fat in it. Let it cool completely before handling — liquid grease stays hot for longer than you’d expect. Dump it, wash it with hot soapy water, done. The spit rod and forks are usually dishwasher-safe, but I hand-wash them because the thumbscrews can collect grease in the threads and the dishwasher doesn’t always get it out cleanly.
The oven interior will have splatter. Wipe it down with a damp cloth while it’s still slightly warm (not hot). Baked-on grease from rotisserie cooking is harder to remove than regular oven splatter — it gets on the ceiling of the oven especially. If you’re consistent about wiping after every rotisserie use, it stays manageable. Let it go three or four sessions and you’re scrubbing for a while.
Final Thoughts
The rotisserie setting is one of those functions that sounds gimmicky until you use it properly and get a genuinely good whole chicken out of a countertop oven on a Tuesday night. It’s not complicated, but it rewards the small details — trussing, dry brining, the right temperature, not stressing the motor with too heavy a load. Get those right and it’ll outperform what you’d get from a standard roast in a conventional oven at the same doneness level, mostly because the air fryer toaster oven environment is just more efficient at browning. I cook rotisserie chicken probably twice a month on mine, and I’ve never gone back to the old static-roasting method for a whole bird.
Frequently Asked Questions
How long does it take to rotisserie a whole chicken in an air fryer toaster oven?
A 3–4 lb whole chicken takes approximately 60–75 minutes at 375°F on the rotisserie setting. The only reliable way to confirm doneness is a meat thermometer reading 165°F at the thickest part of the thigh, not touching bone. Larger birds (4–5 lbs) will need 75–90 minutes.
What temperature should I use for the rotisserie setting on an air fryer toaster oven?
375°F is the standard starting point for most whole poultry and pork roasts on the rotisserie. Because air fryer toaster ovens run hotter than conventional ovens at the same displayed temperature, you generally want to set it 10–15°F lower than a standard oven recipe would call for. For small cuts or glazed items, 350°F toward the end of cooking helps prevent burning.
Do I need to use the rotisserie basket or can I just use the spit?
The spit with forks is for whole roasts and larger cuts that can be skewered through the center. The rotisserie basket is for small, loose items like vegetables, shrimp, or cubed meat that would fall through or off a spit. You don’t need both for every cook — use whichever fits what you’re cooking.
Why does my rotisserie keep stopping mid-cook?
The most common reason is that the food is too heavy for the motor — most countertop air fryer toaster oven rotisserie motors top out around 4–5 lbs. It can also happen if the food has shifted and is pressing against the oven wall or the rod isn’t fully seated in the motor bracket. Turn the oven off, reposition the food and re-seat the rod, then restart.
Can I use the rotisserie setting without the spit (just for air frying)?
Yes — on most machines the rotisserie setting is really just a labeled combination of high-convection heat and the spit motor. If you remove the spit and use the same temperature settings with a wire rack and air fryer basket, you’re effectively using the high-convection air fry mode. Some ovens require you to select a different mode label to do this, so check your specific model’s controls.

Written by
Emma founded Toastera to turn vague appliance advice into clear, researched, safety-first guidance on toasters and toaster ovens.
Free: the Toaster Oven Cheat Sheet
Get the printable cheat sheet (temps, cook times & safety tips) plus new recipes. No spam, unsubscribe anytime.